Lock and Finalize Document

Overview
Purpose of the Article
This guide explains how notaries can lock and finalize a document in Notary Hub, ensuring it is securely sealed and tamper-proof after signing.
Who Should Use This Guide
- Notaries conducting remote online notarizations (RON) who need to finalize documents.
Key Takeaways
- Understanding the requirements for locking a document.
- How to lock a document within a signing session.
- The steps involved in finalizing a signing session.
- What to do if issues arise during the locking or finalization process.
Prerequisites
Before you can lock documents and finalize a session, ensure that:
- You have a Notary Hub account with notary privileges.
- At least one document is present in the session.
- You have a X.509 certificate and authenticator app.
Step-by-Step Instructions
Locking and Finalizing a Document
After all signers and witnesses have completed their required fields, the notary must lock and finalize the document to complete the session. This ensures the document remains legally binding and unaltered.
Steps to Lock a Document
| Instructions | Visuals |
|---|---|
| Log in to Notary Hub and join the RON session as shown in the "Joining a Signing Session as a Notary" tutorial video. |  |
| Review the document: Carefully review each document to ensure all required signatures, initials, dates, and your notary stamp and signature are correctly placed. | 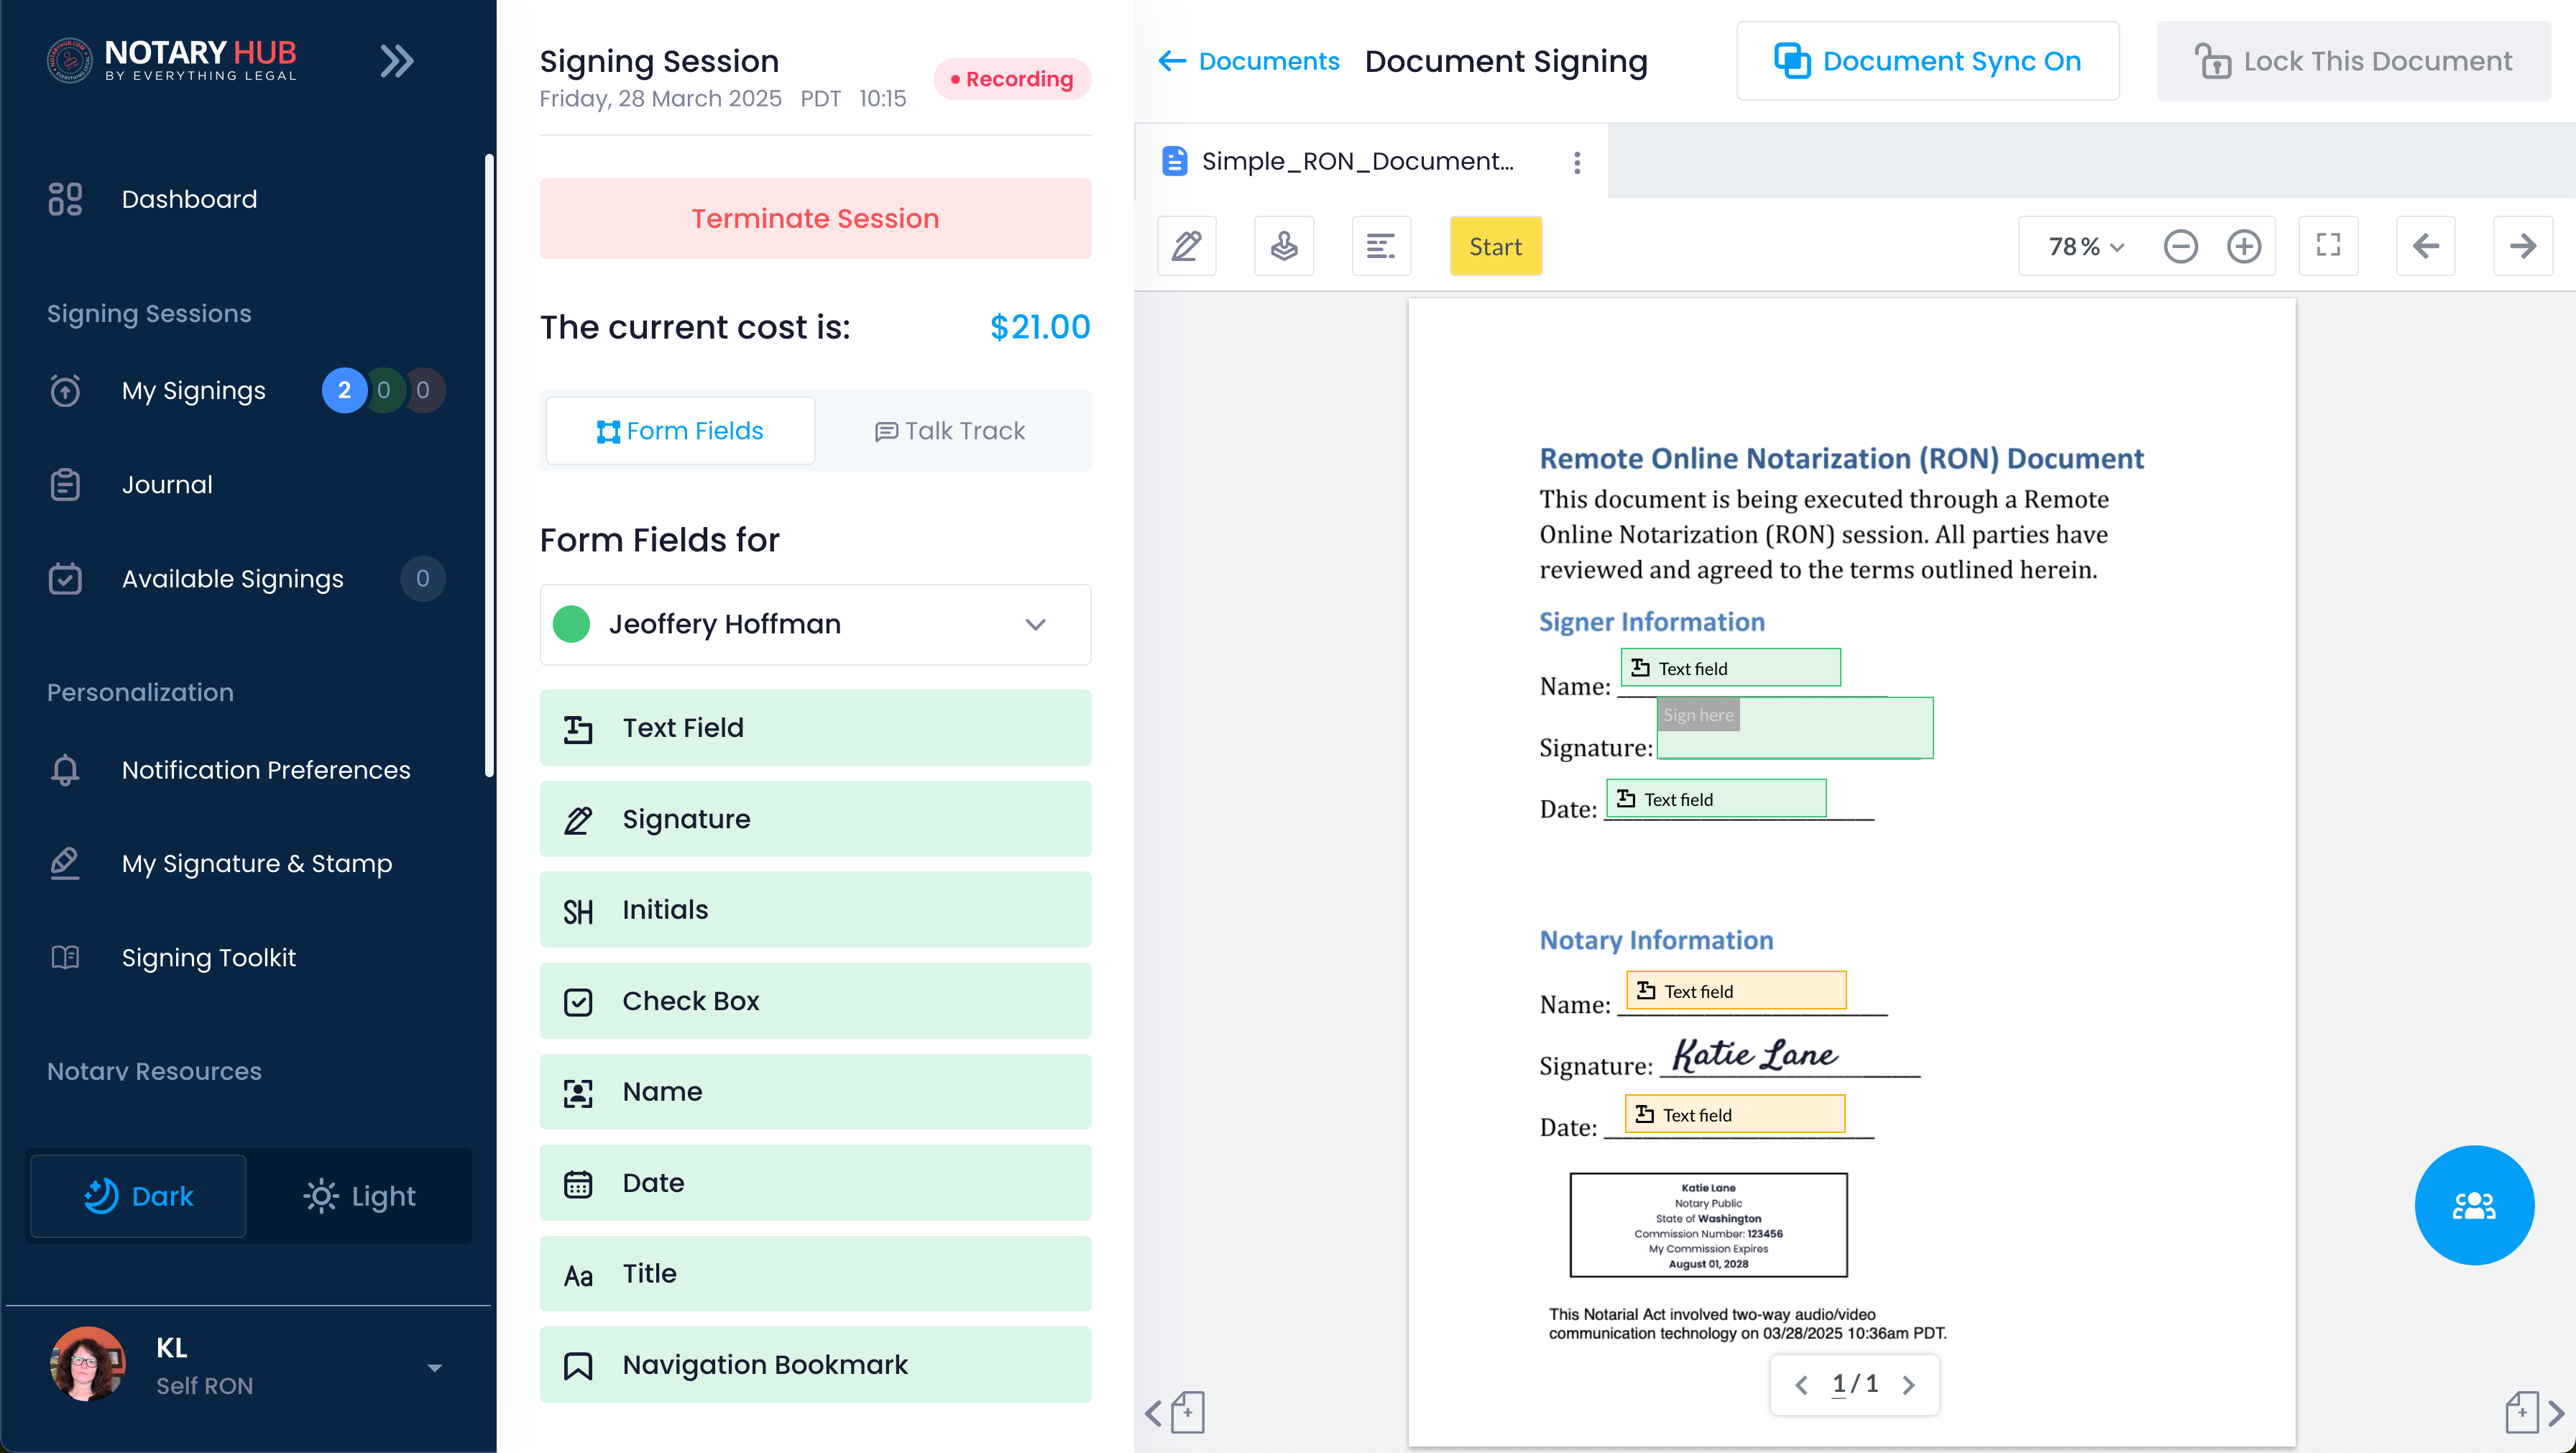 |
| Address any incomplete items: Ensure all consumers have signed where required. If you hover over "Lock This Document", the button's tooltip provides additional explanation and notifies you on-the-fly what is left to complete. | 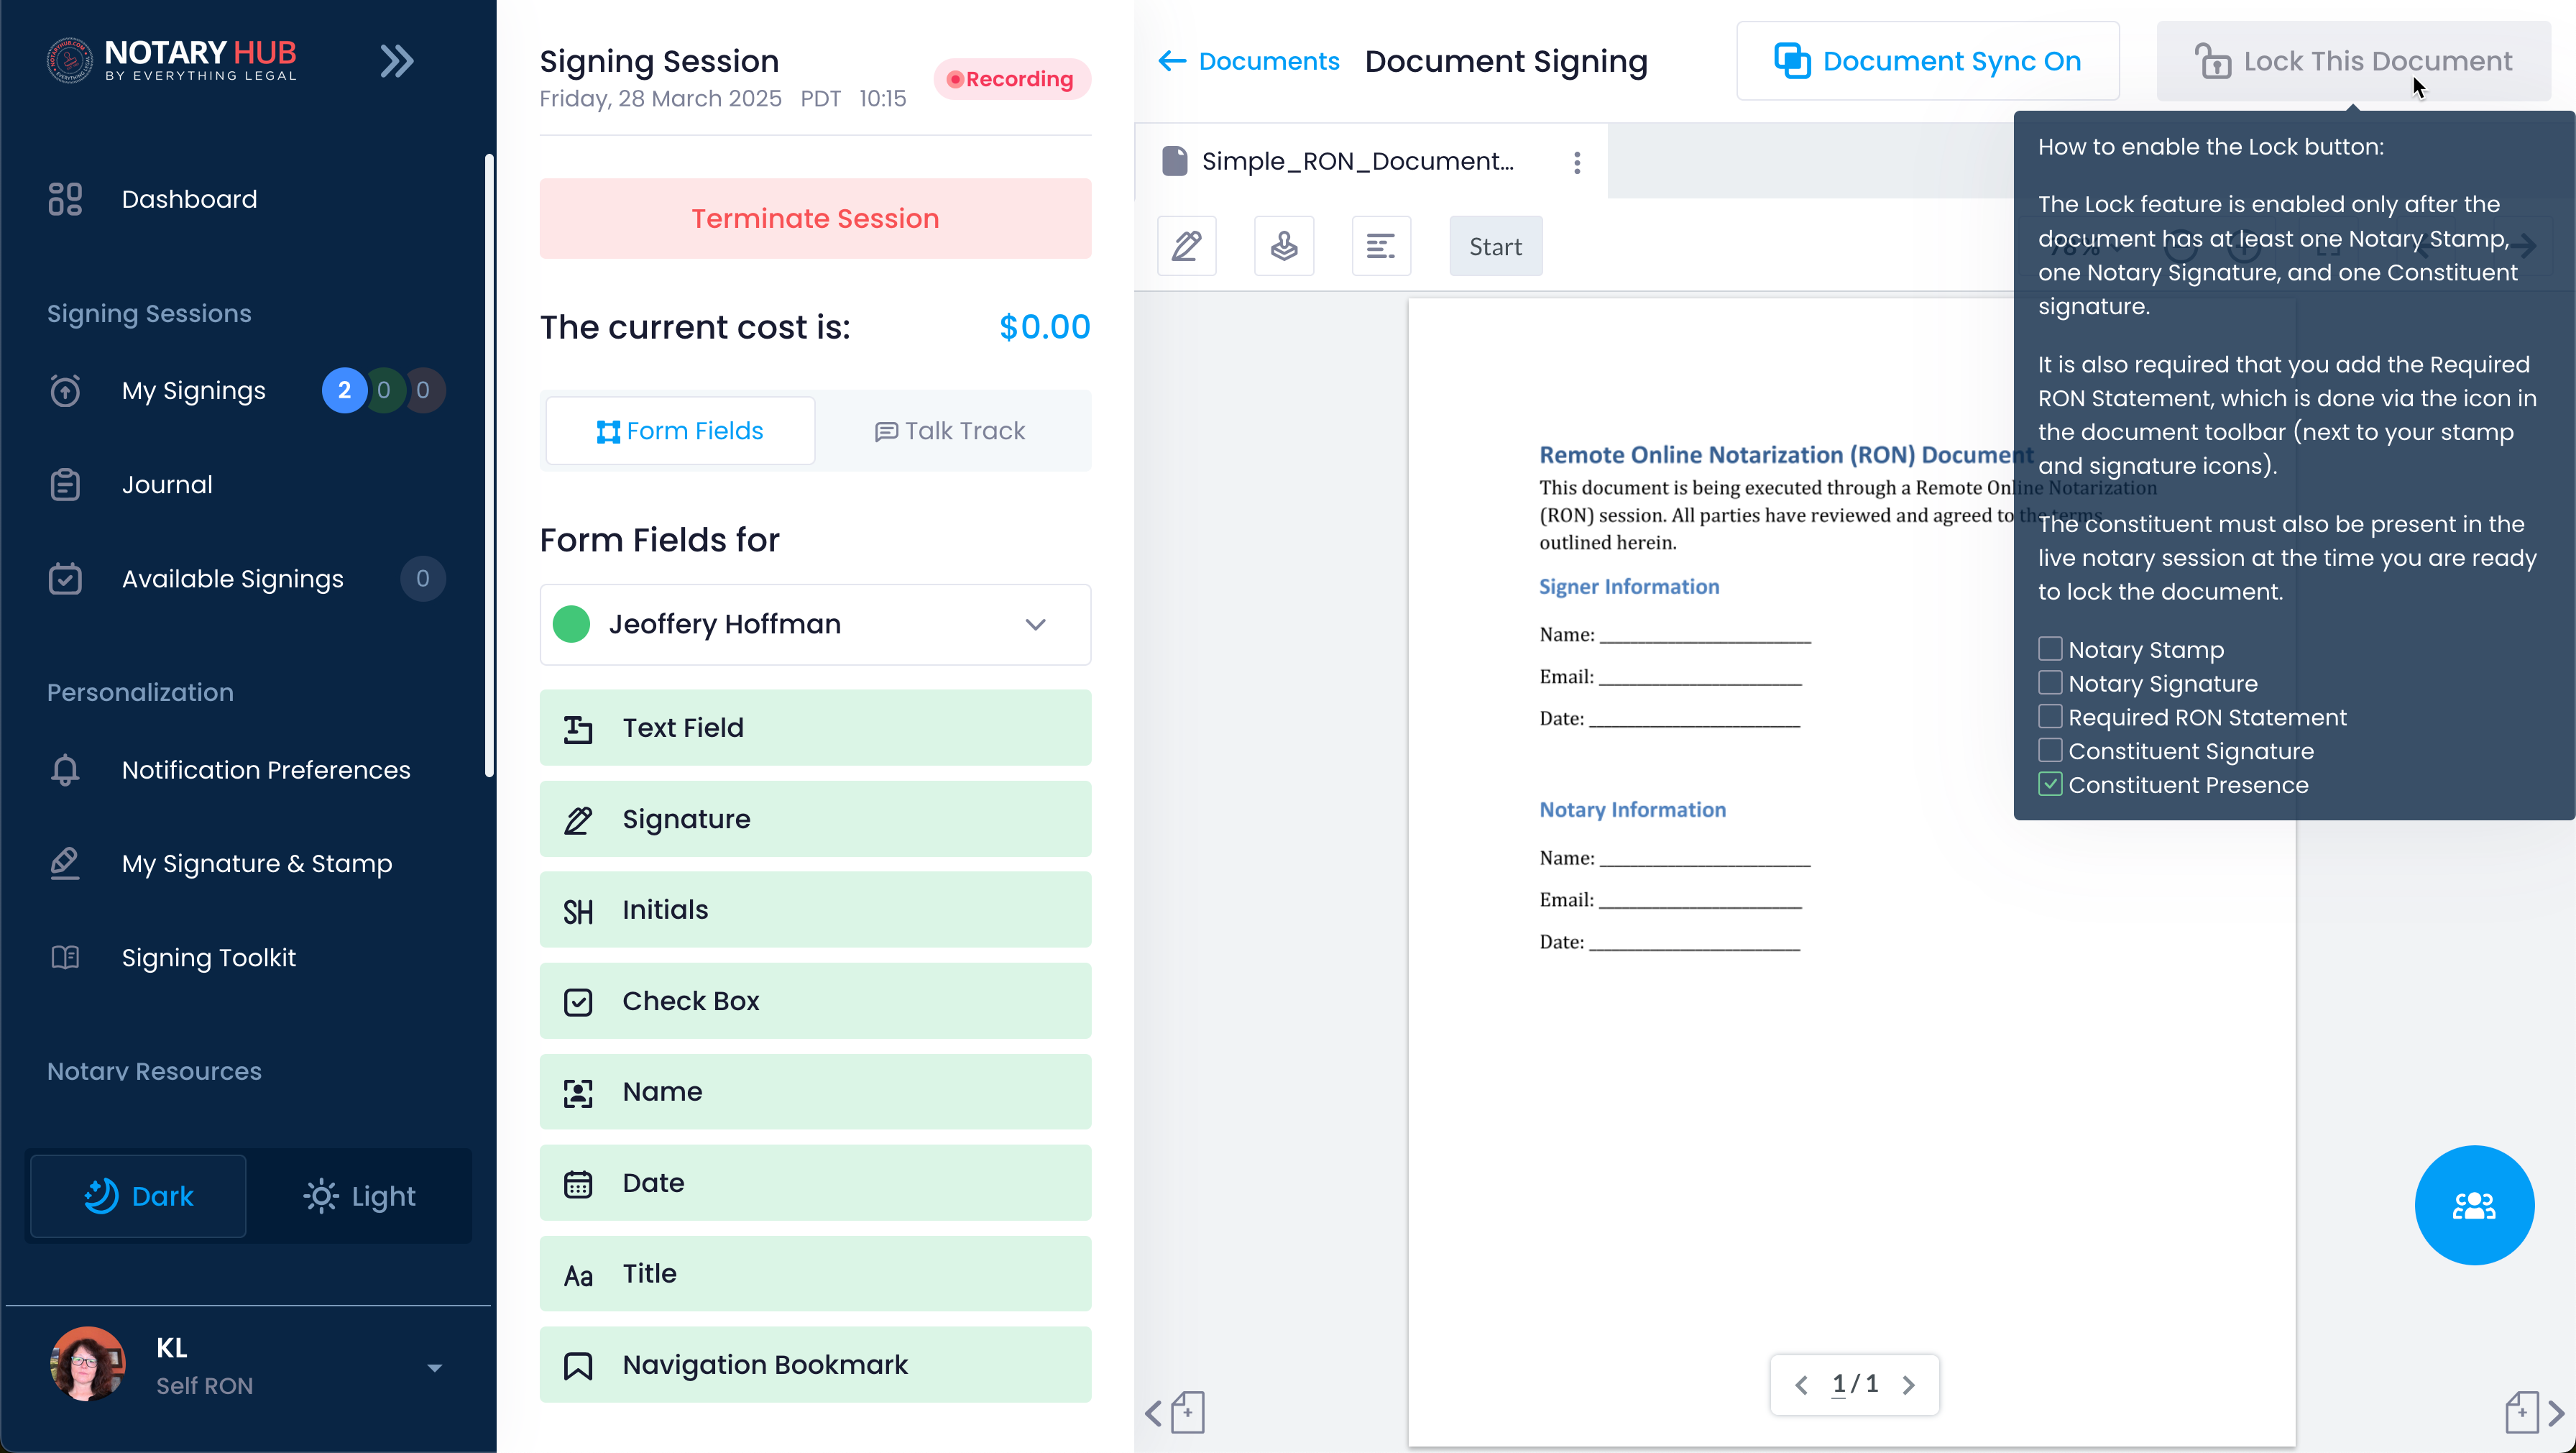 |
| Review the document to confirm all required signatures and fields are filled for constituents. | 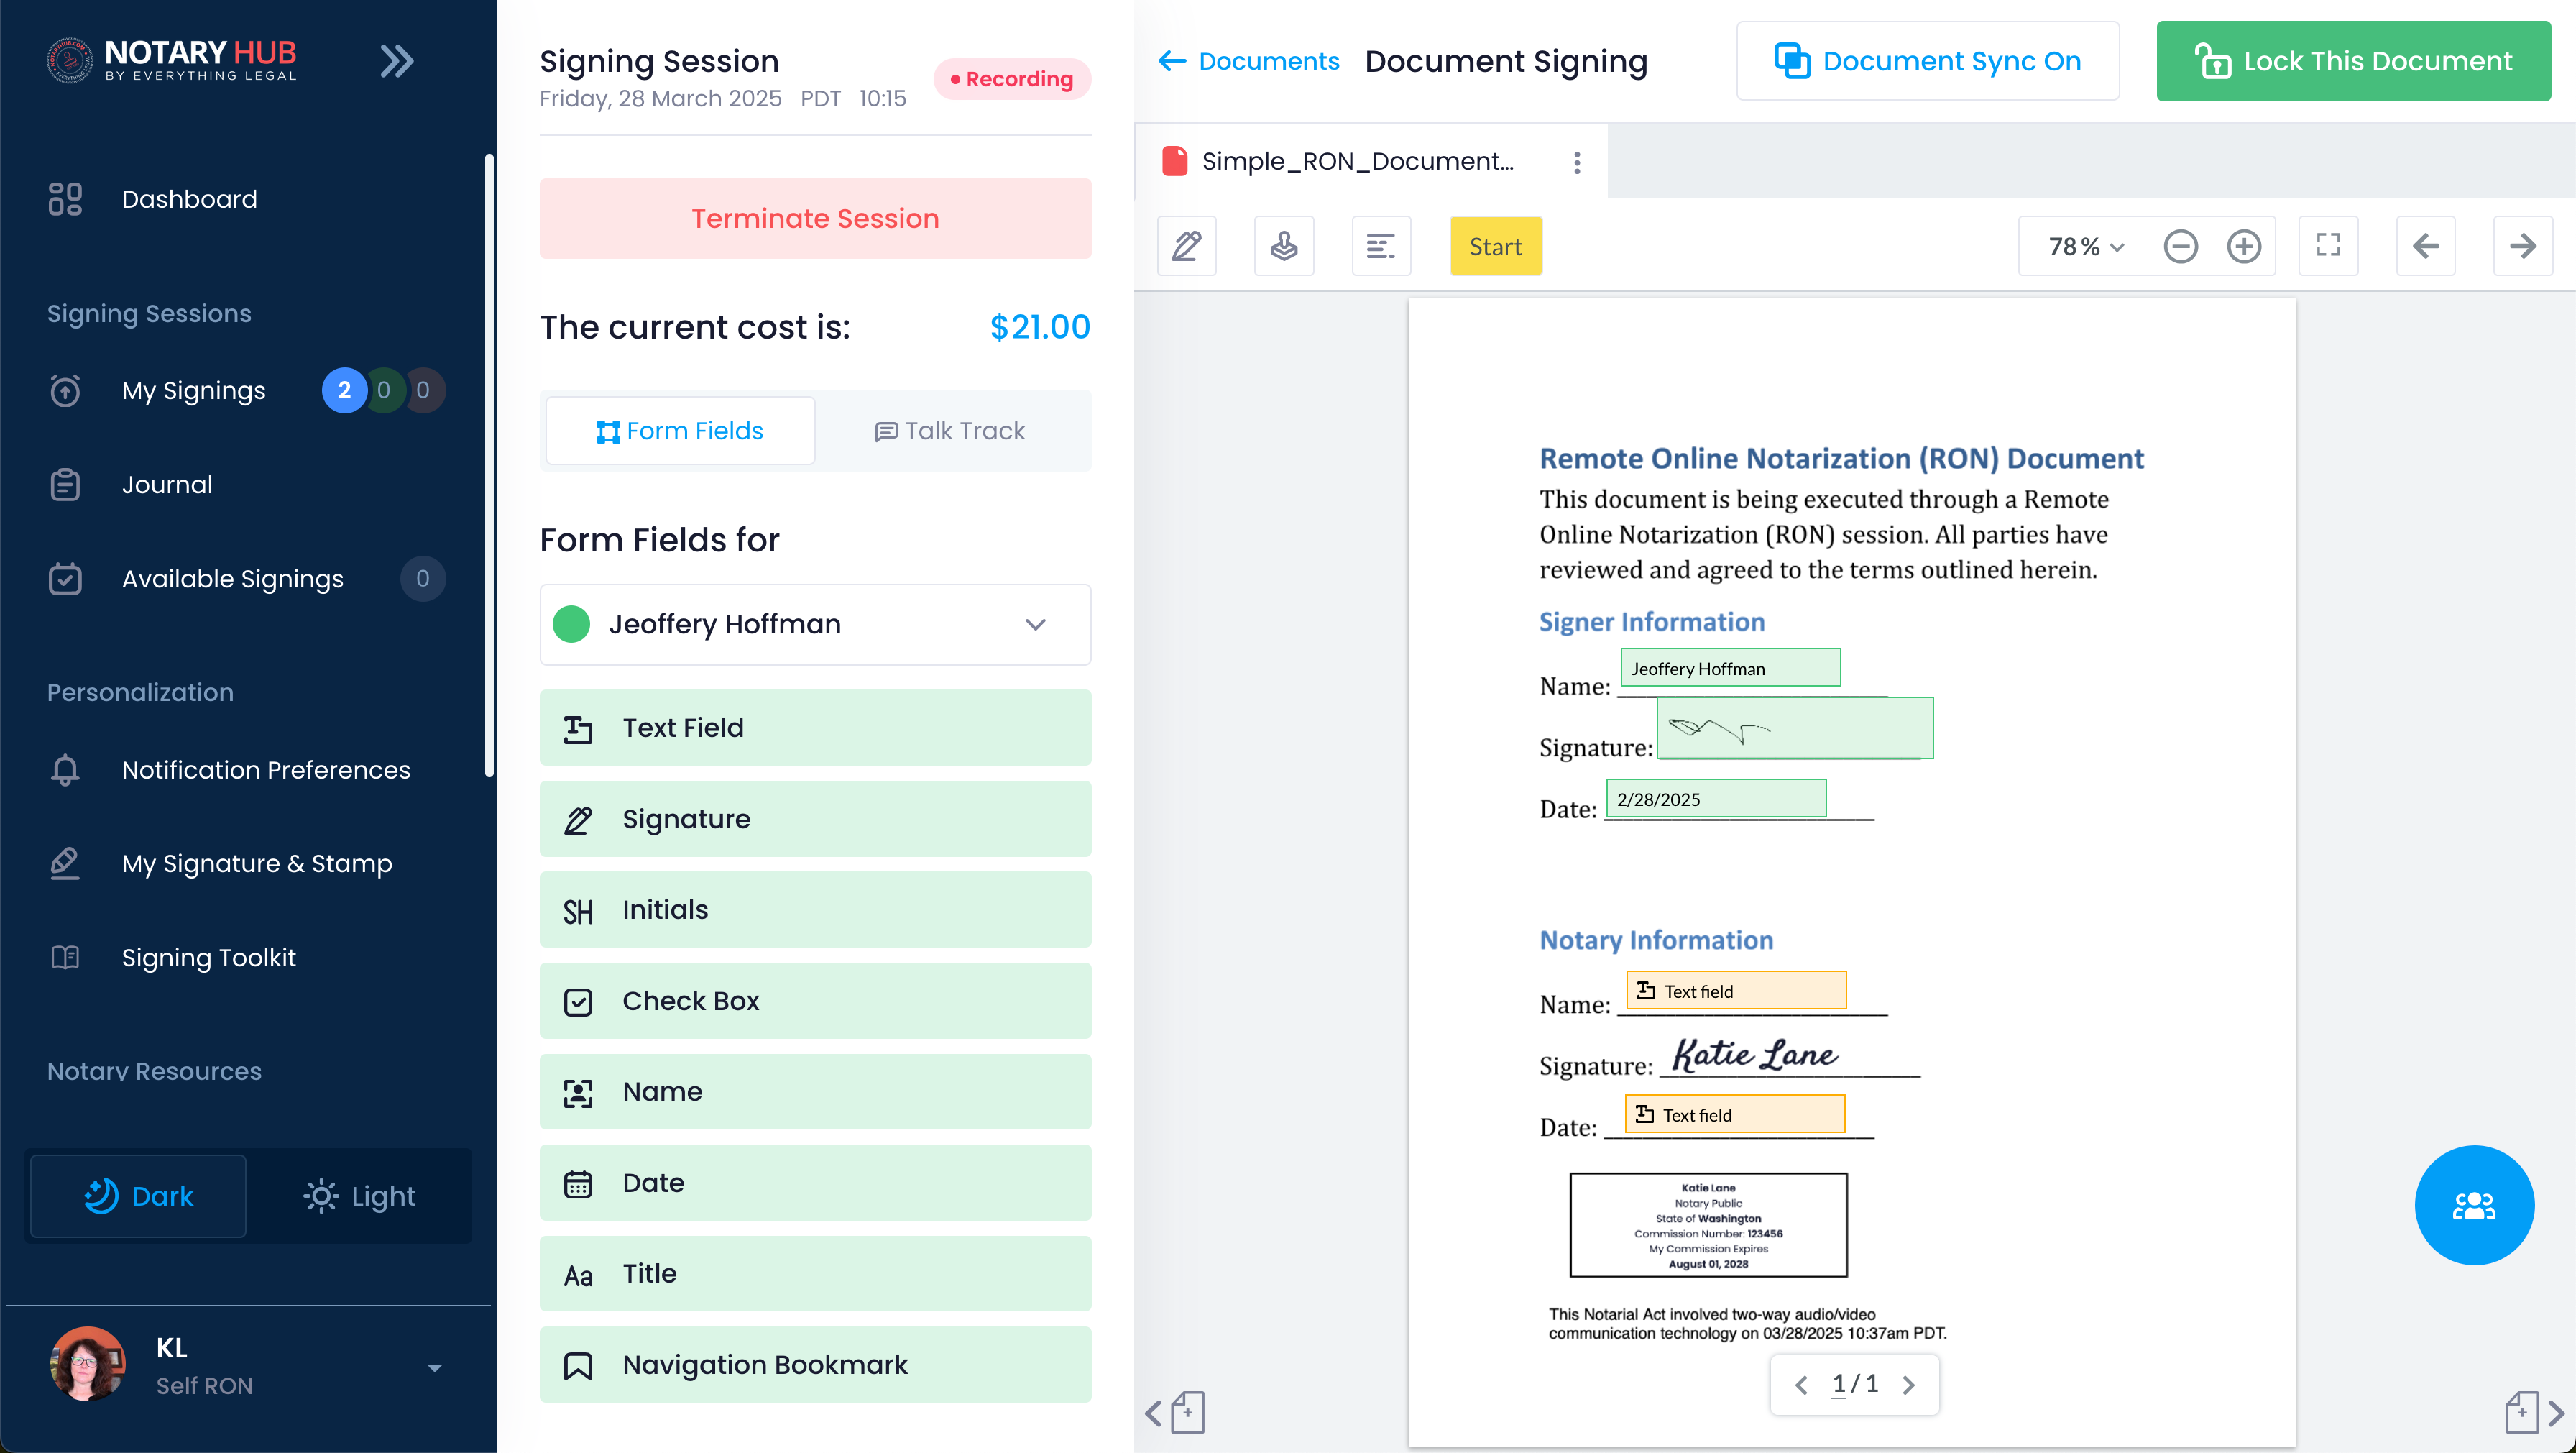 |
| Confirm you have the filled out required fields for yourself (the notary) as well as the notary stamp, signature, and RON statement. Once all requirements are met, the previously grey "Lock This Document" button will turn green. |  |
| Click the "Lock This Document" button. | 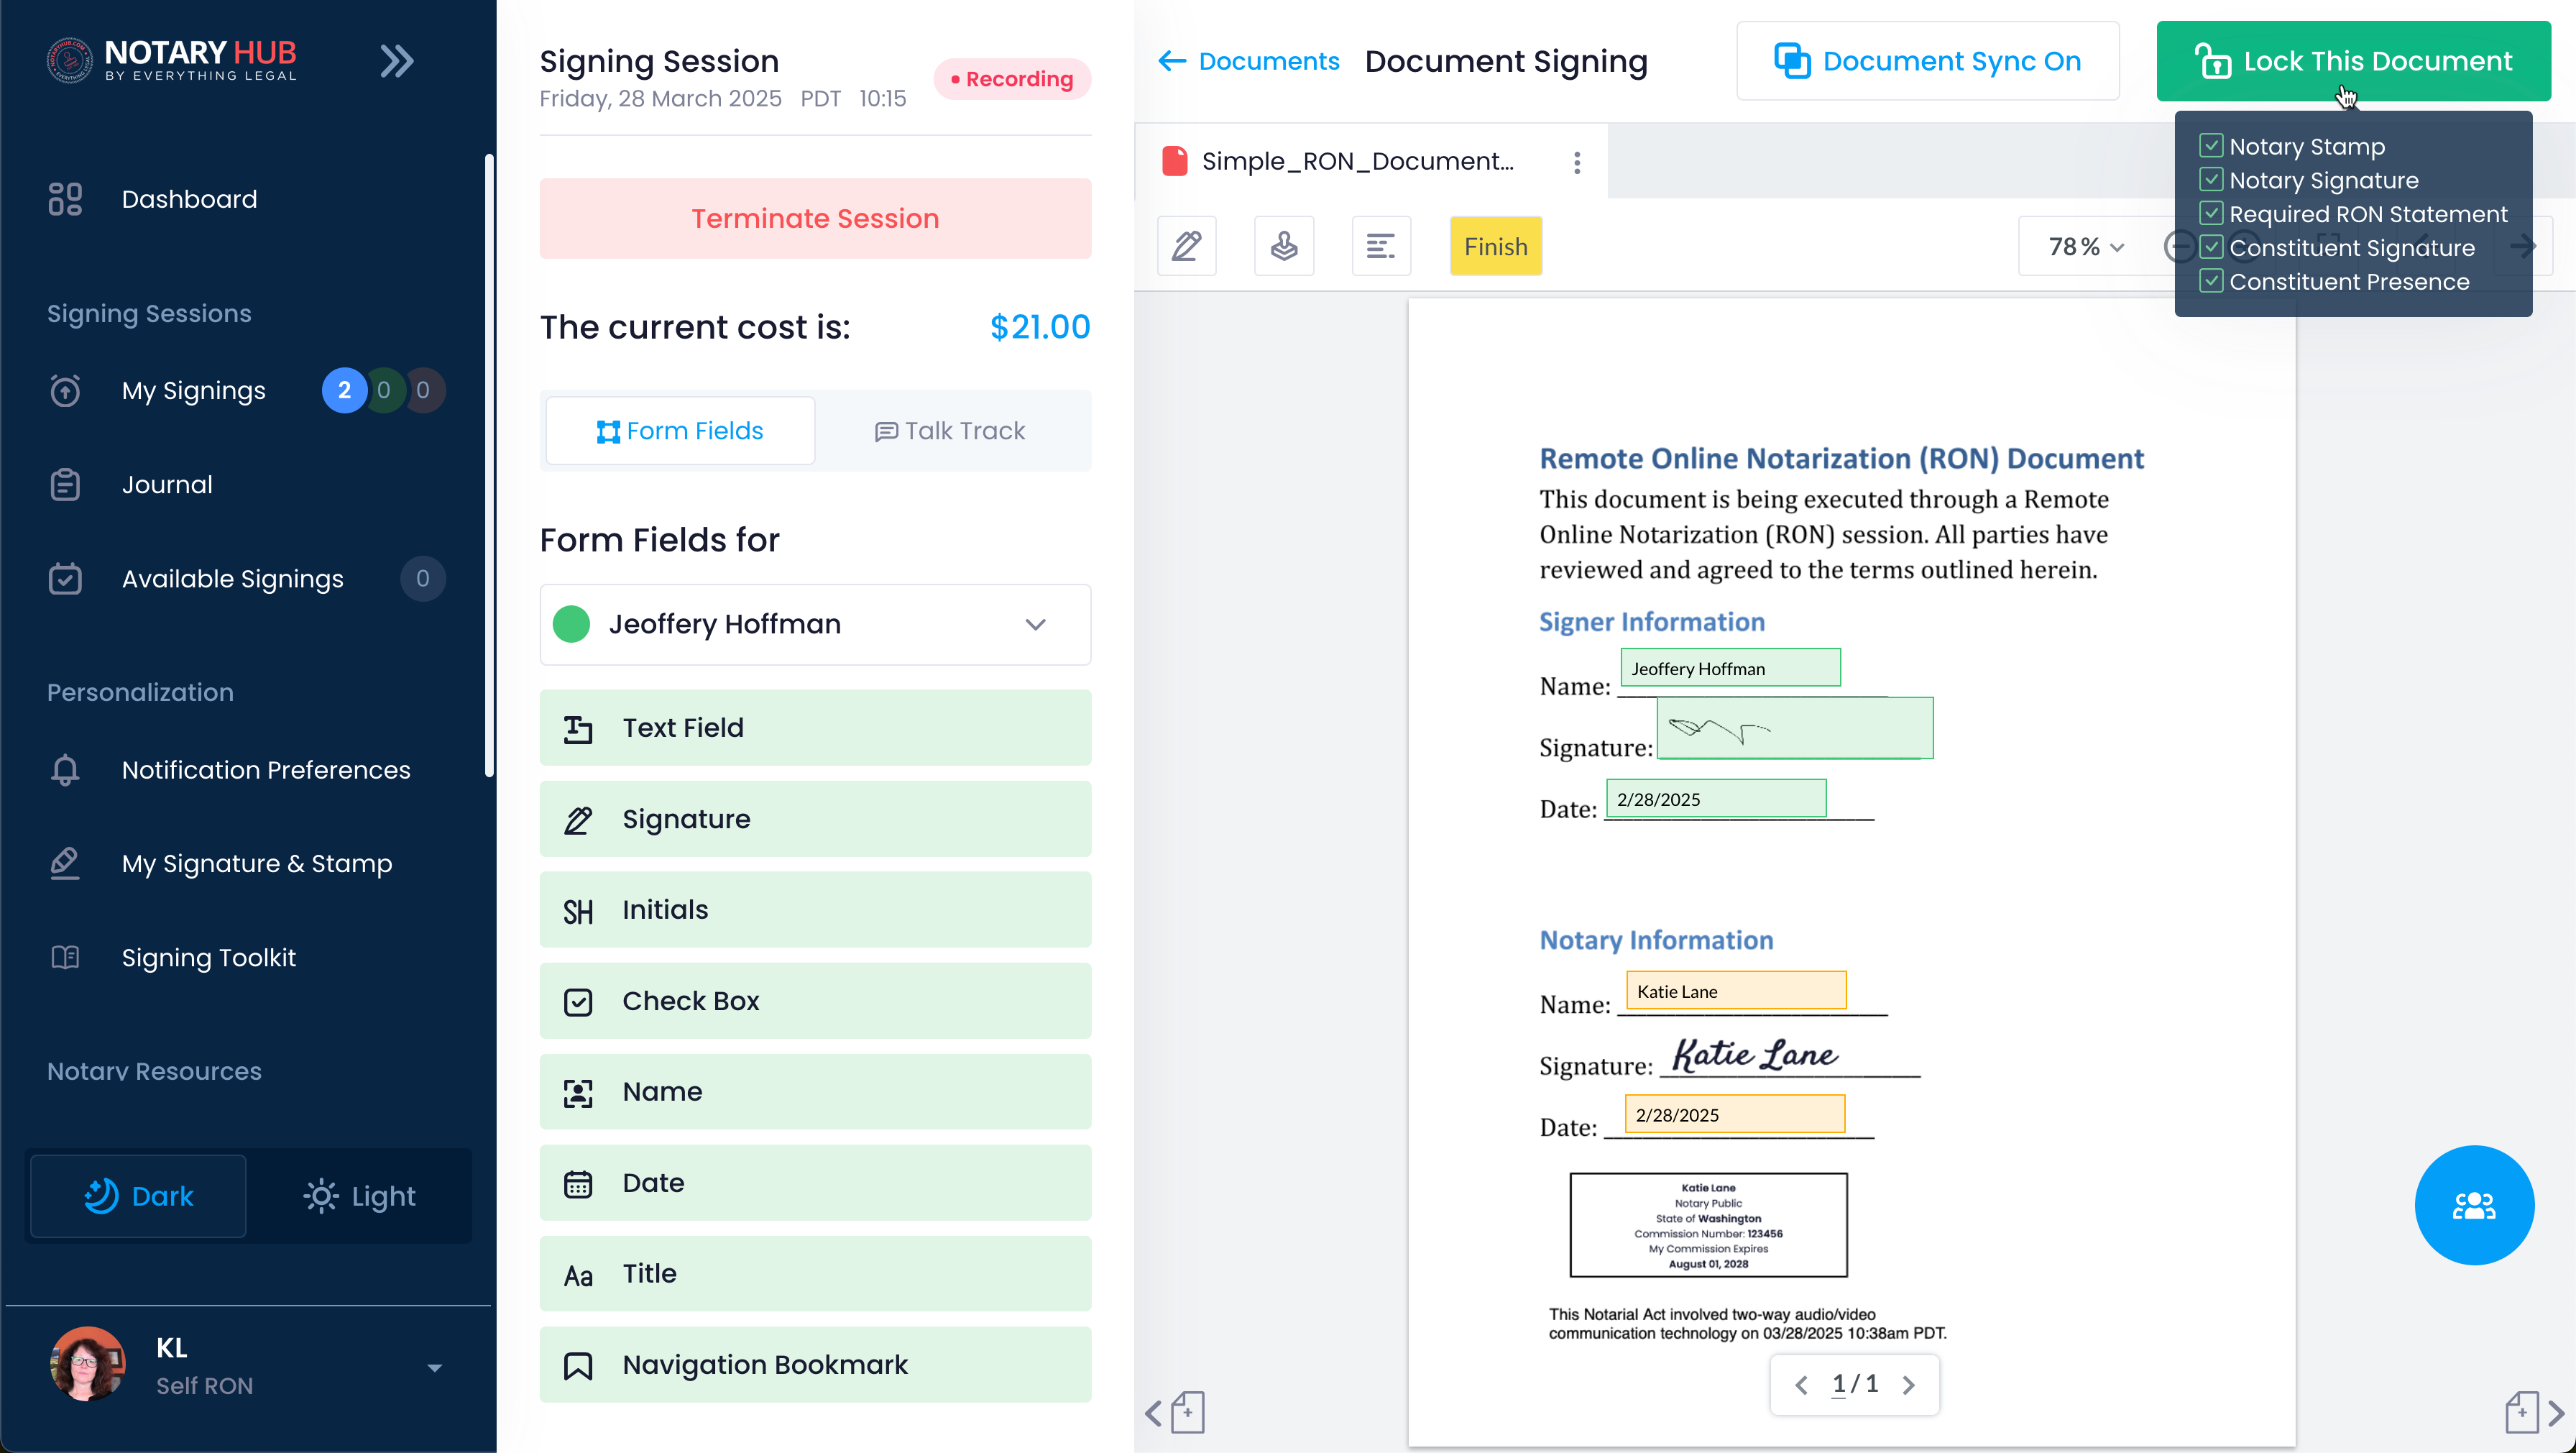 |
| Confirmation: After clicking, you will see a pop-up to review the merged document and confirm all the information is correct. Click "Confirm" after you have done your final review. | 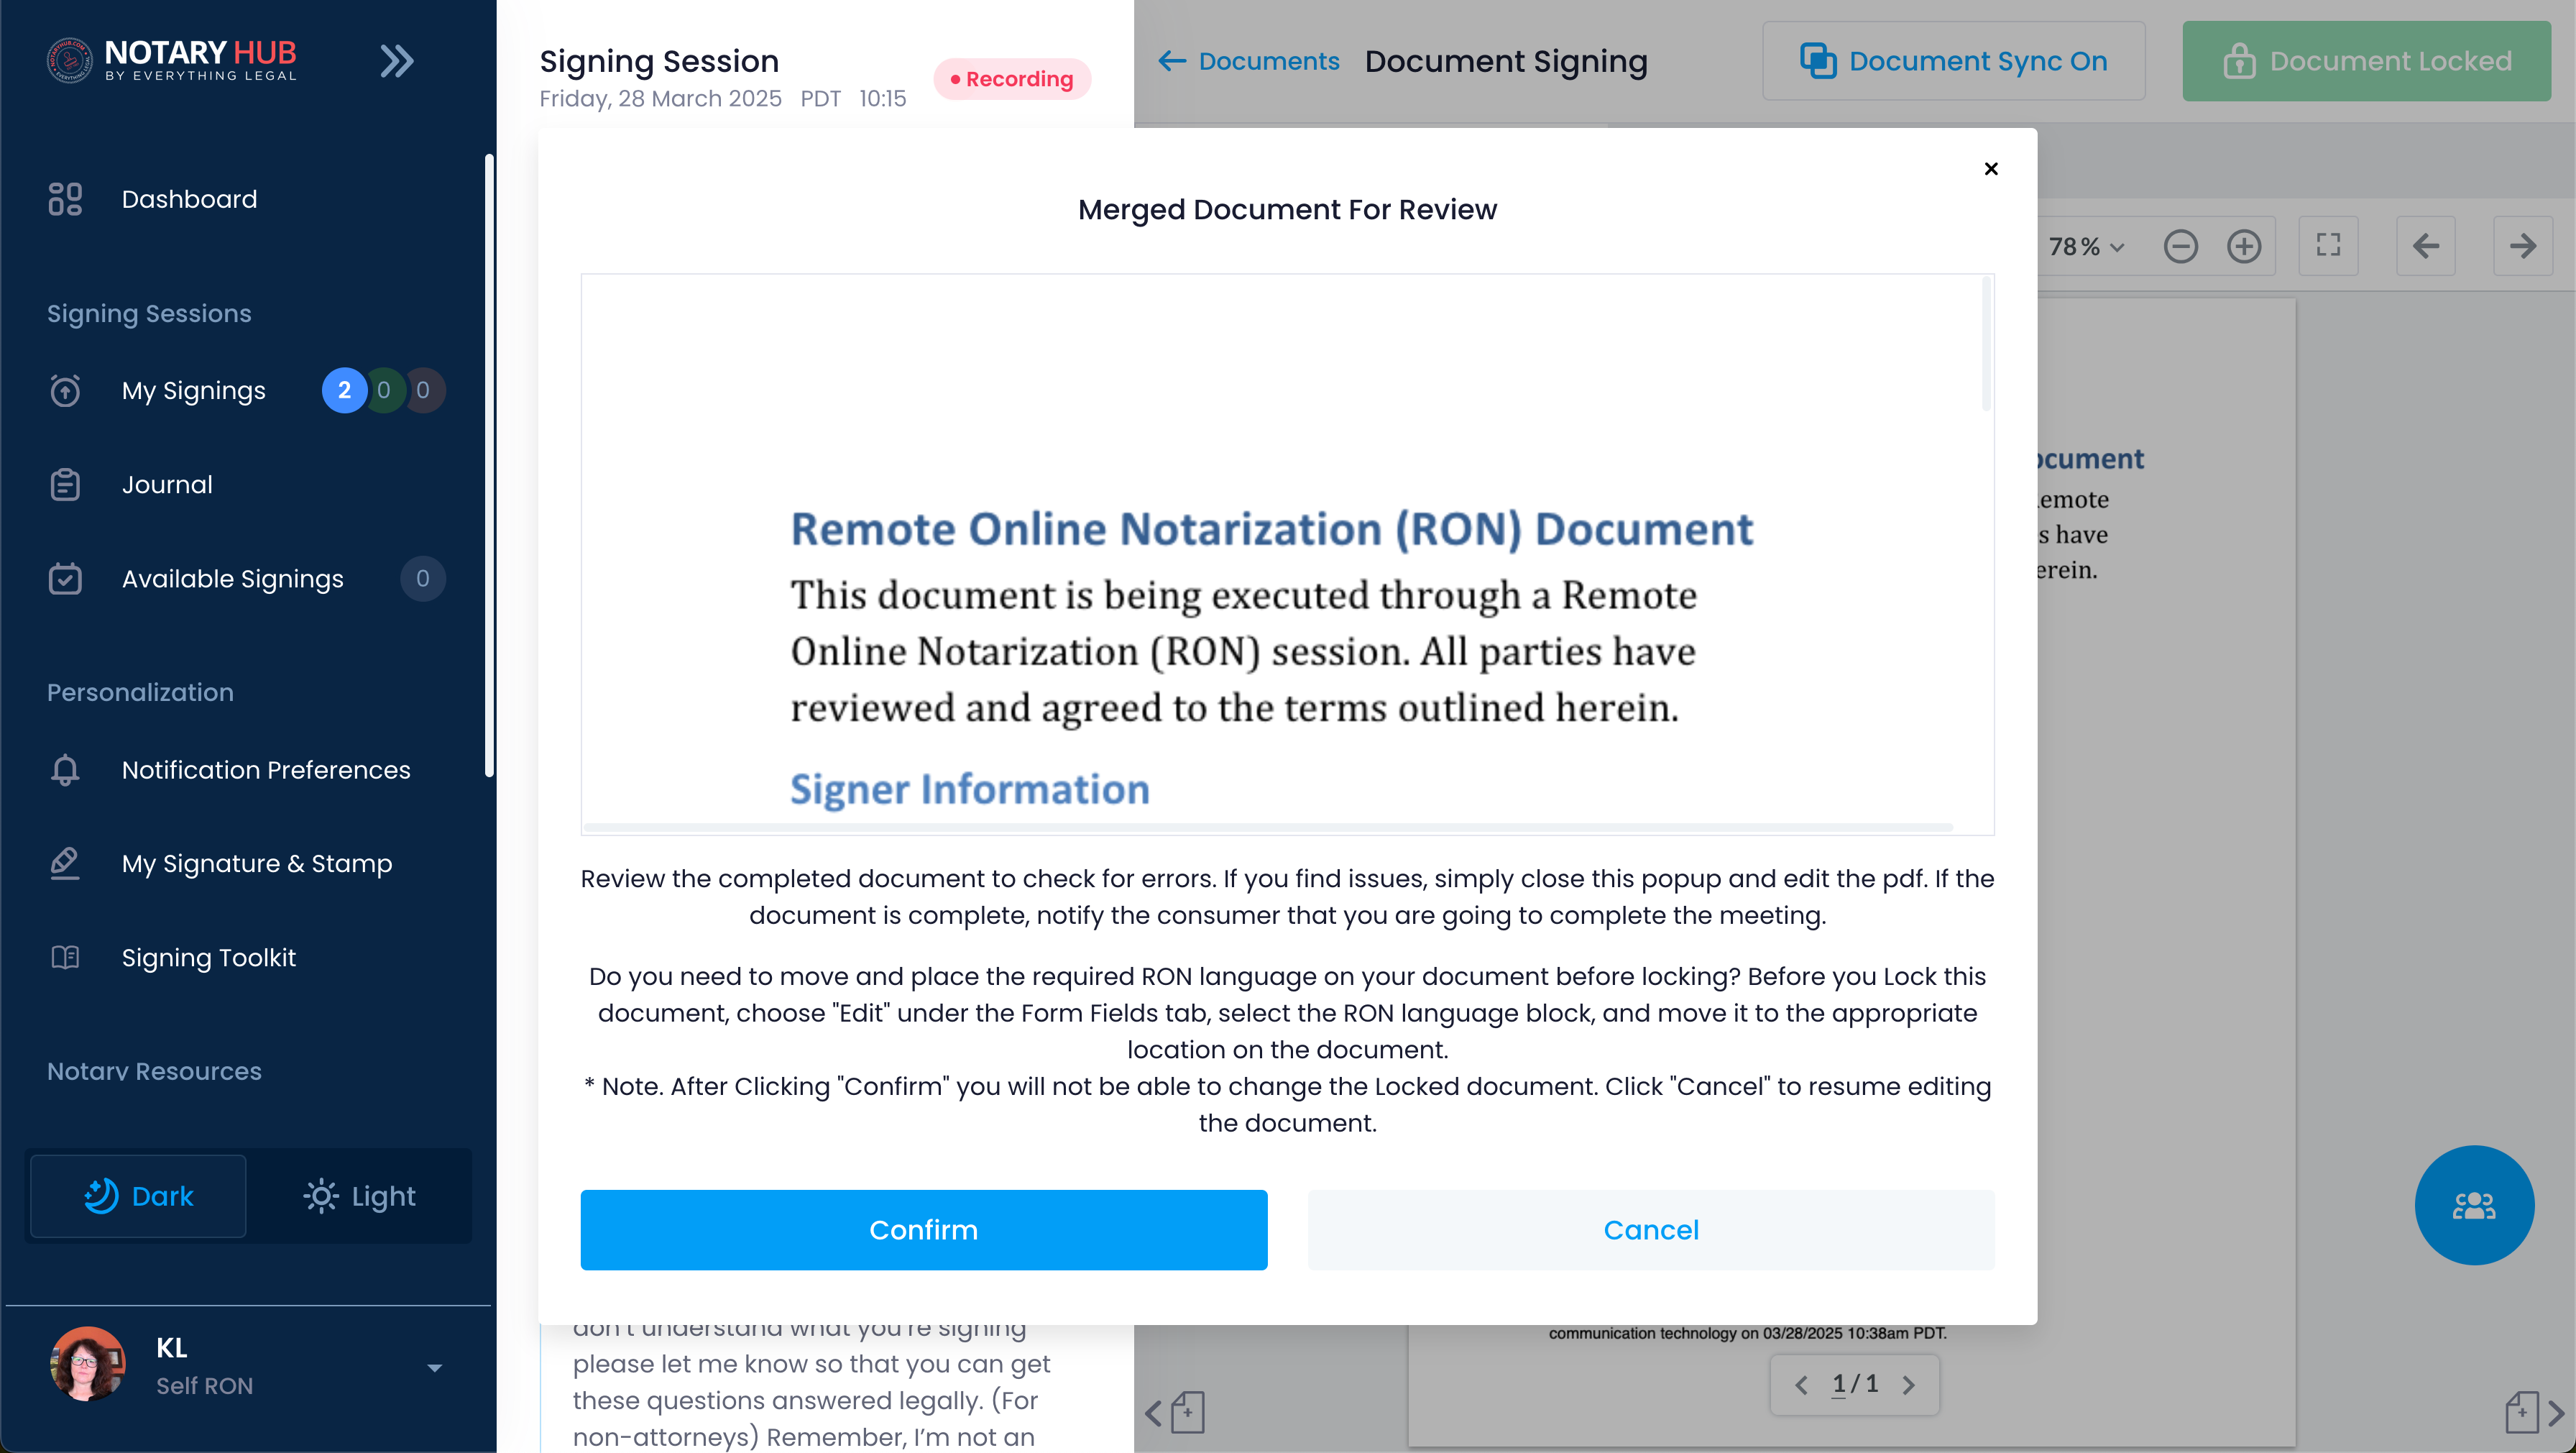 |
| Visual Indicator: Once a document is locked, you will return to the session signing page and see the document with a green lock icon next to its title. Locked documents cannot be deleted or moved to the Library, and their edit page will not have options for changing them. | 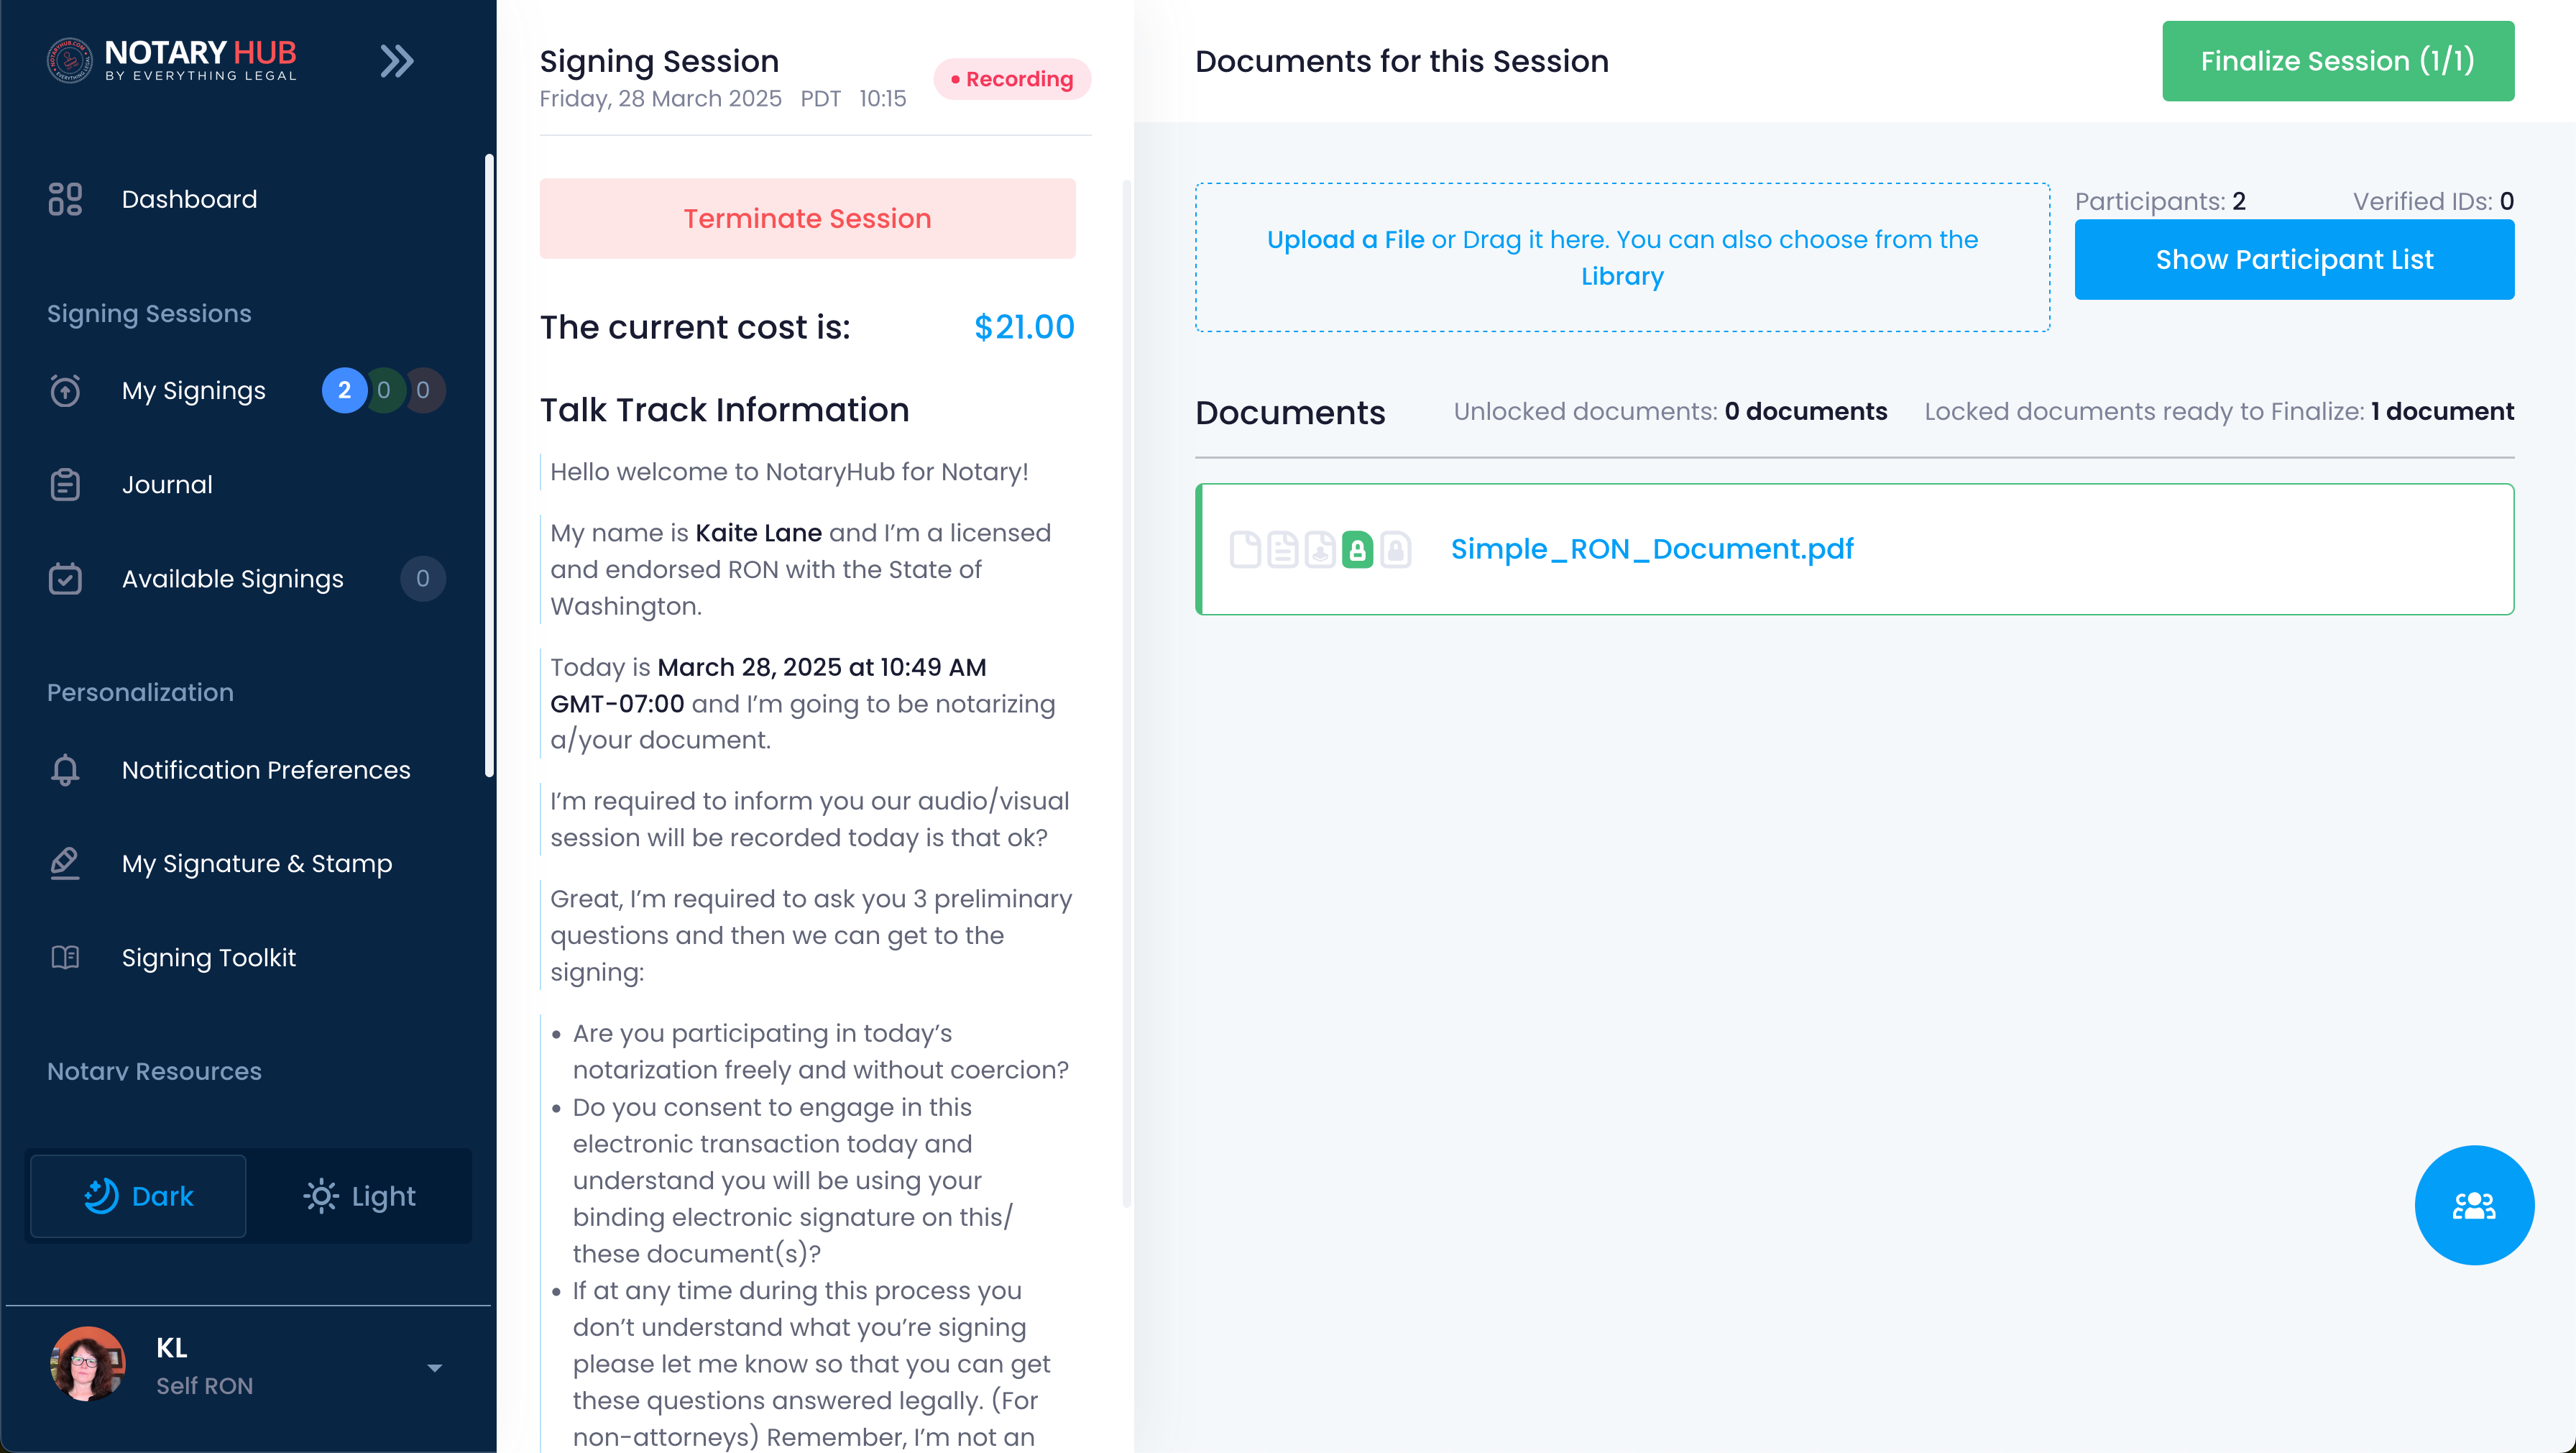 |
Steps to Finalize the Session
| Instructions | Visuals |
|---|---|
| After all of your documents have been locked, you can finalize the session. Click the green "Finalize Session" button in the top right corner. | 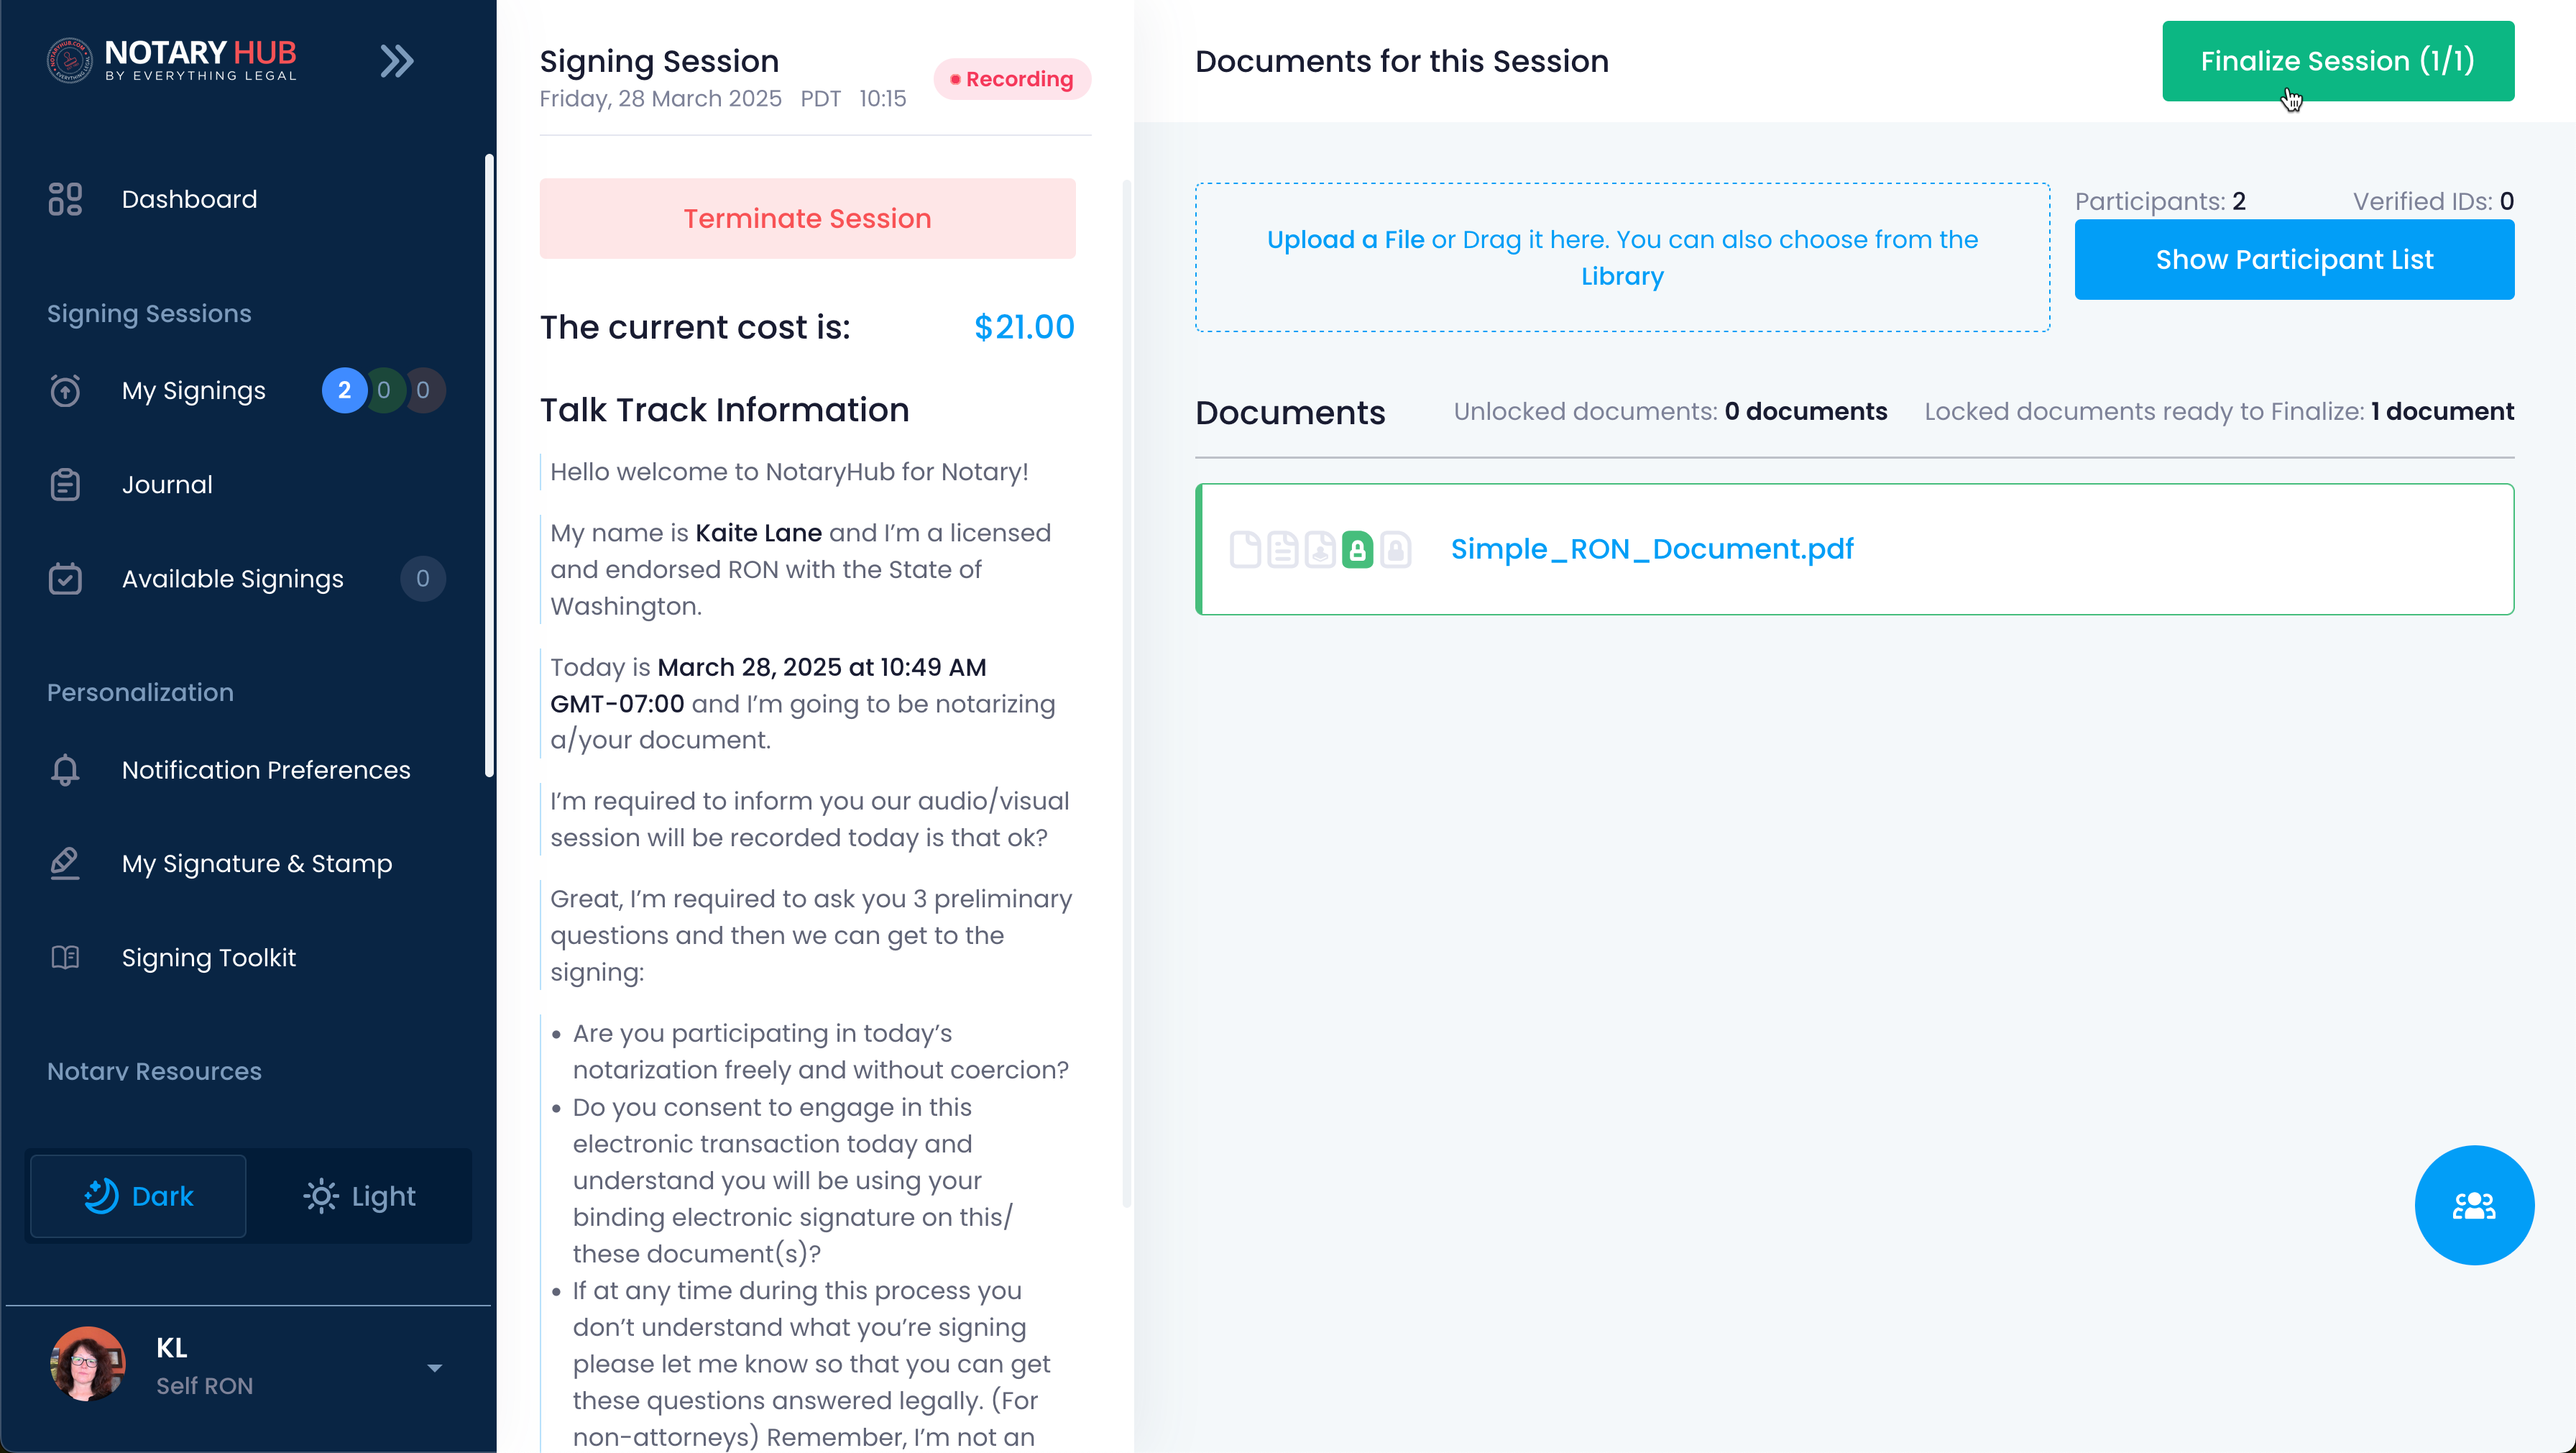 |
| If you are using an SSL certificate, the next screen you will confirm and add your digital certificate. Click the blue "Apply your SSL Digital Certificate" button. |  |
| You will be prompted to login to SSL.com with your SSL username and password. | 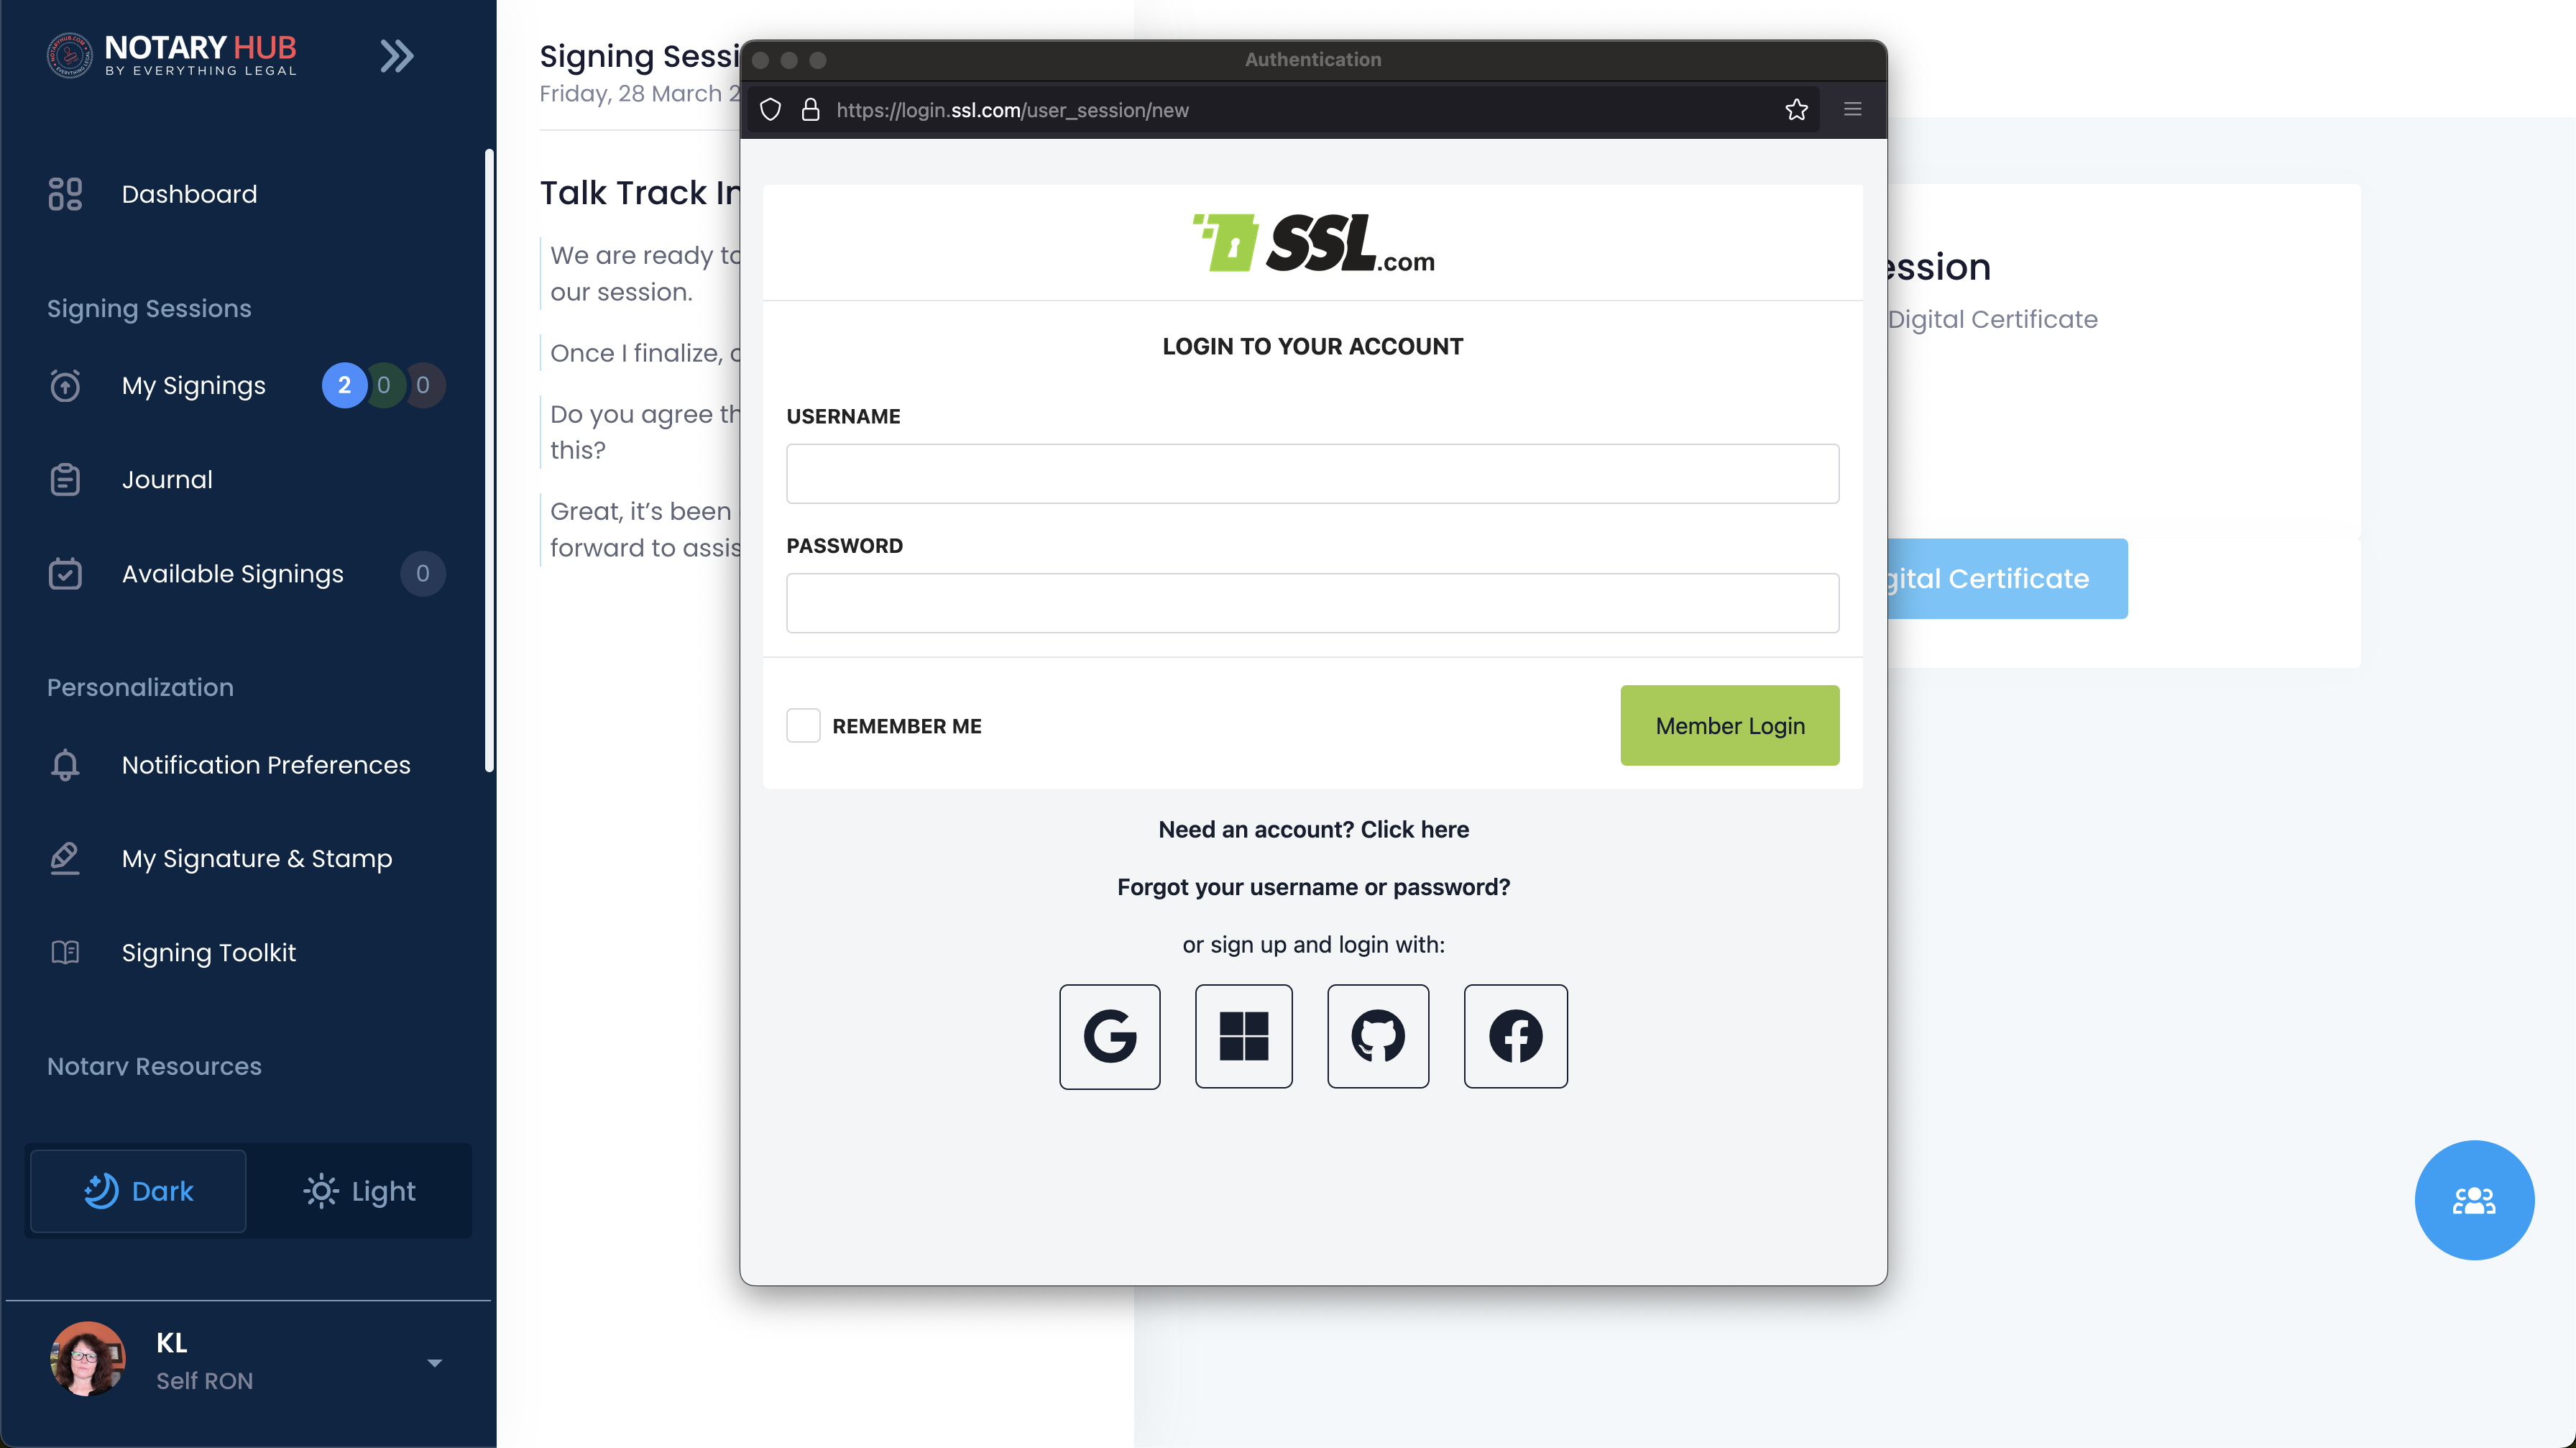 |
| A pop-up will appear with your certificate information. Confirm it is correct and click the blue "Digitally sign document" button. | 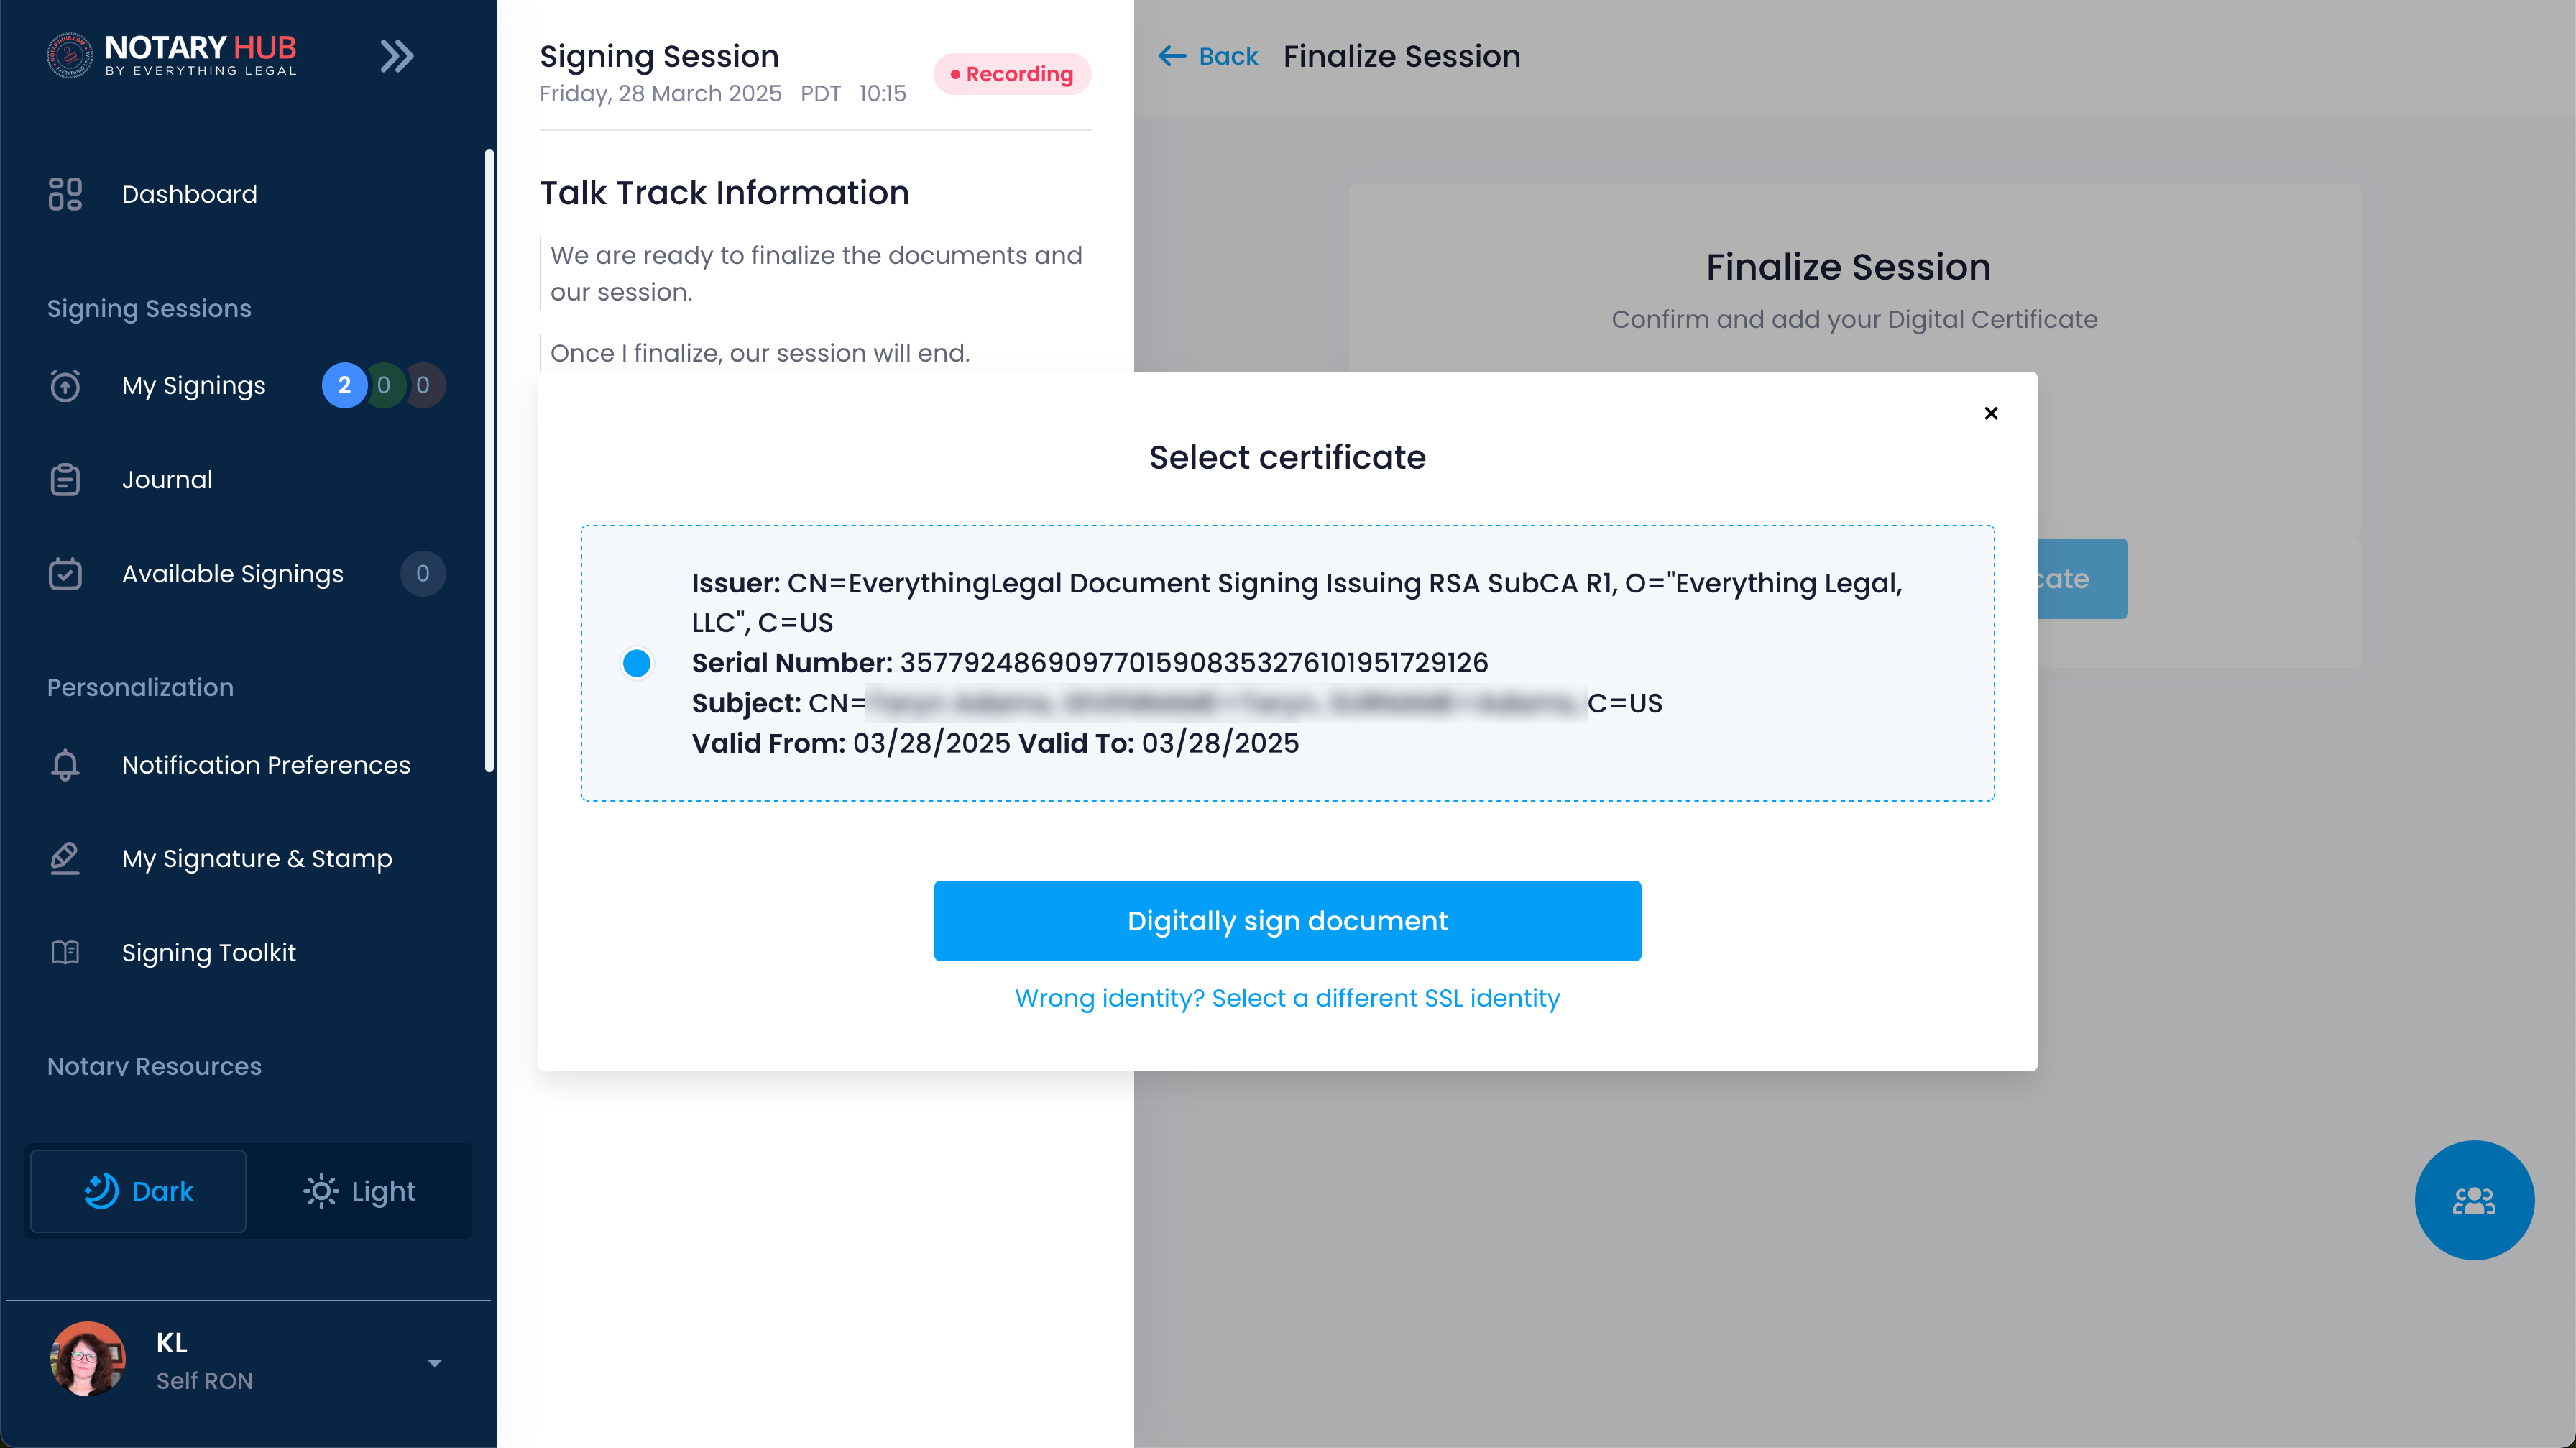 |
| You will be prompted to enter your current 6-digit code from your authenticator app. After successful verification, your digital signature and notary seal will be applied. | 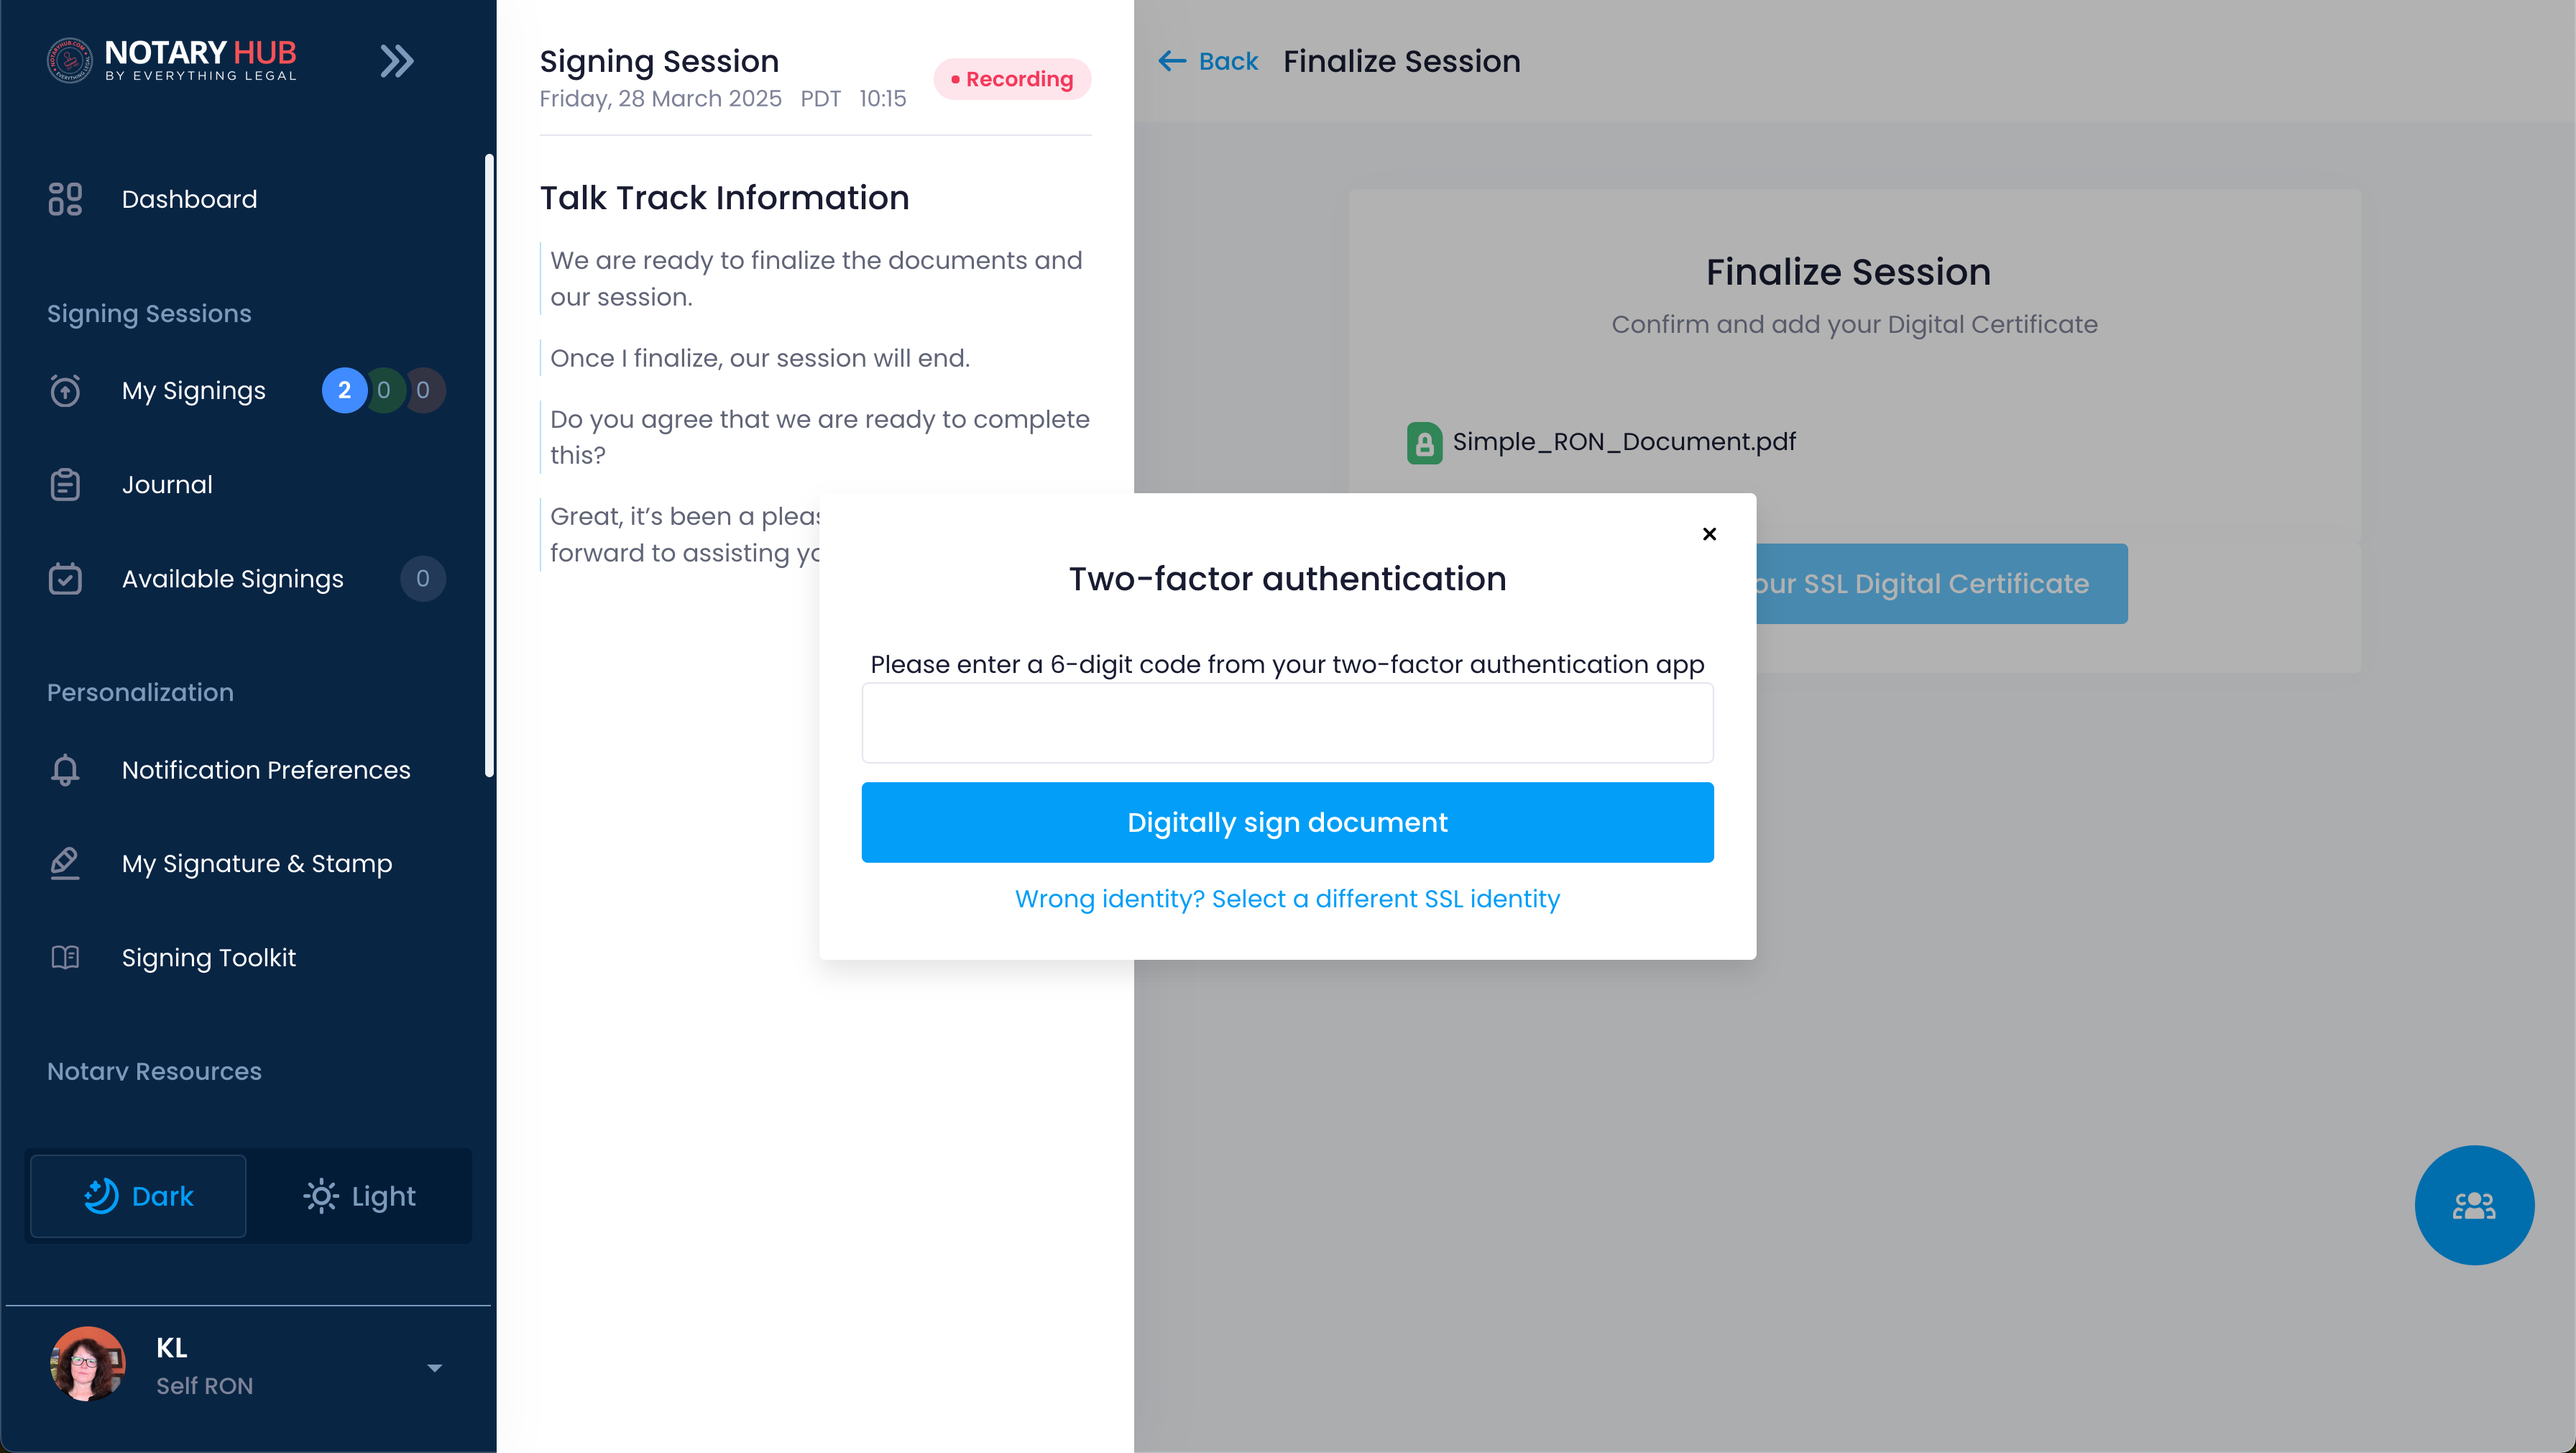 |
| The Signing Session is now complete. The system will give you about a minute to wrap up the call with the constituent(s) and say goodbye. You can also hang up manually. | 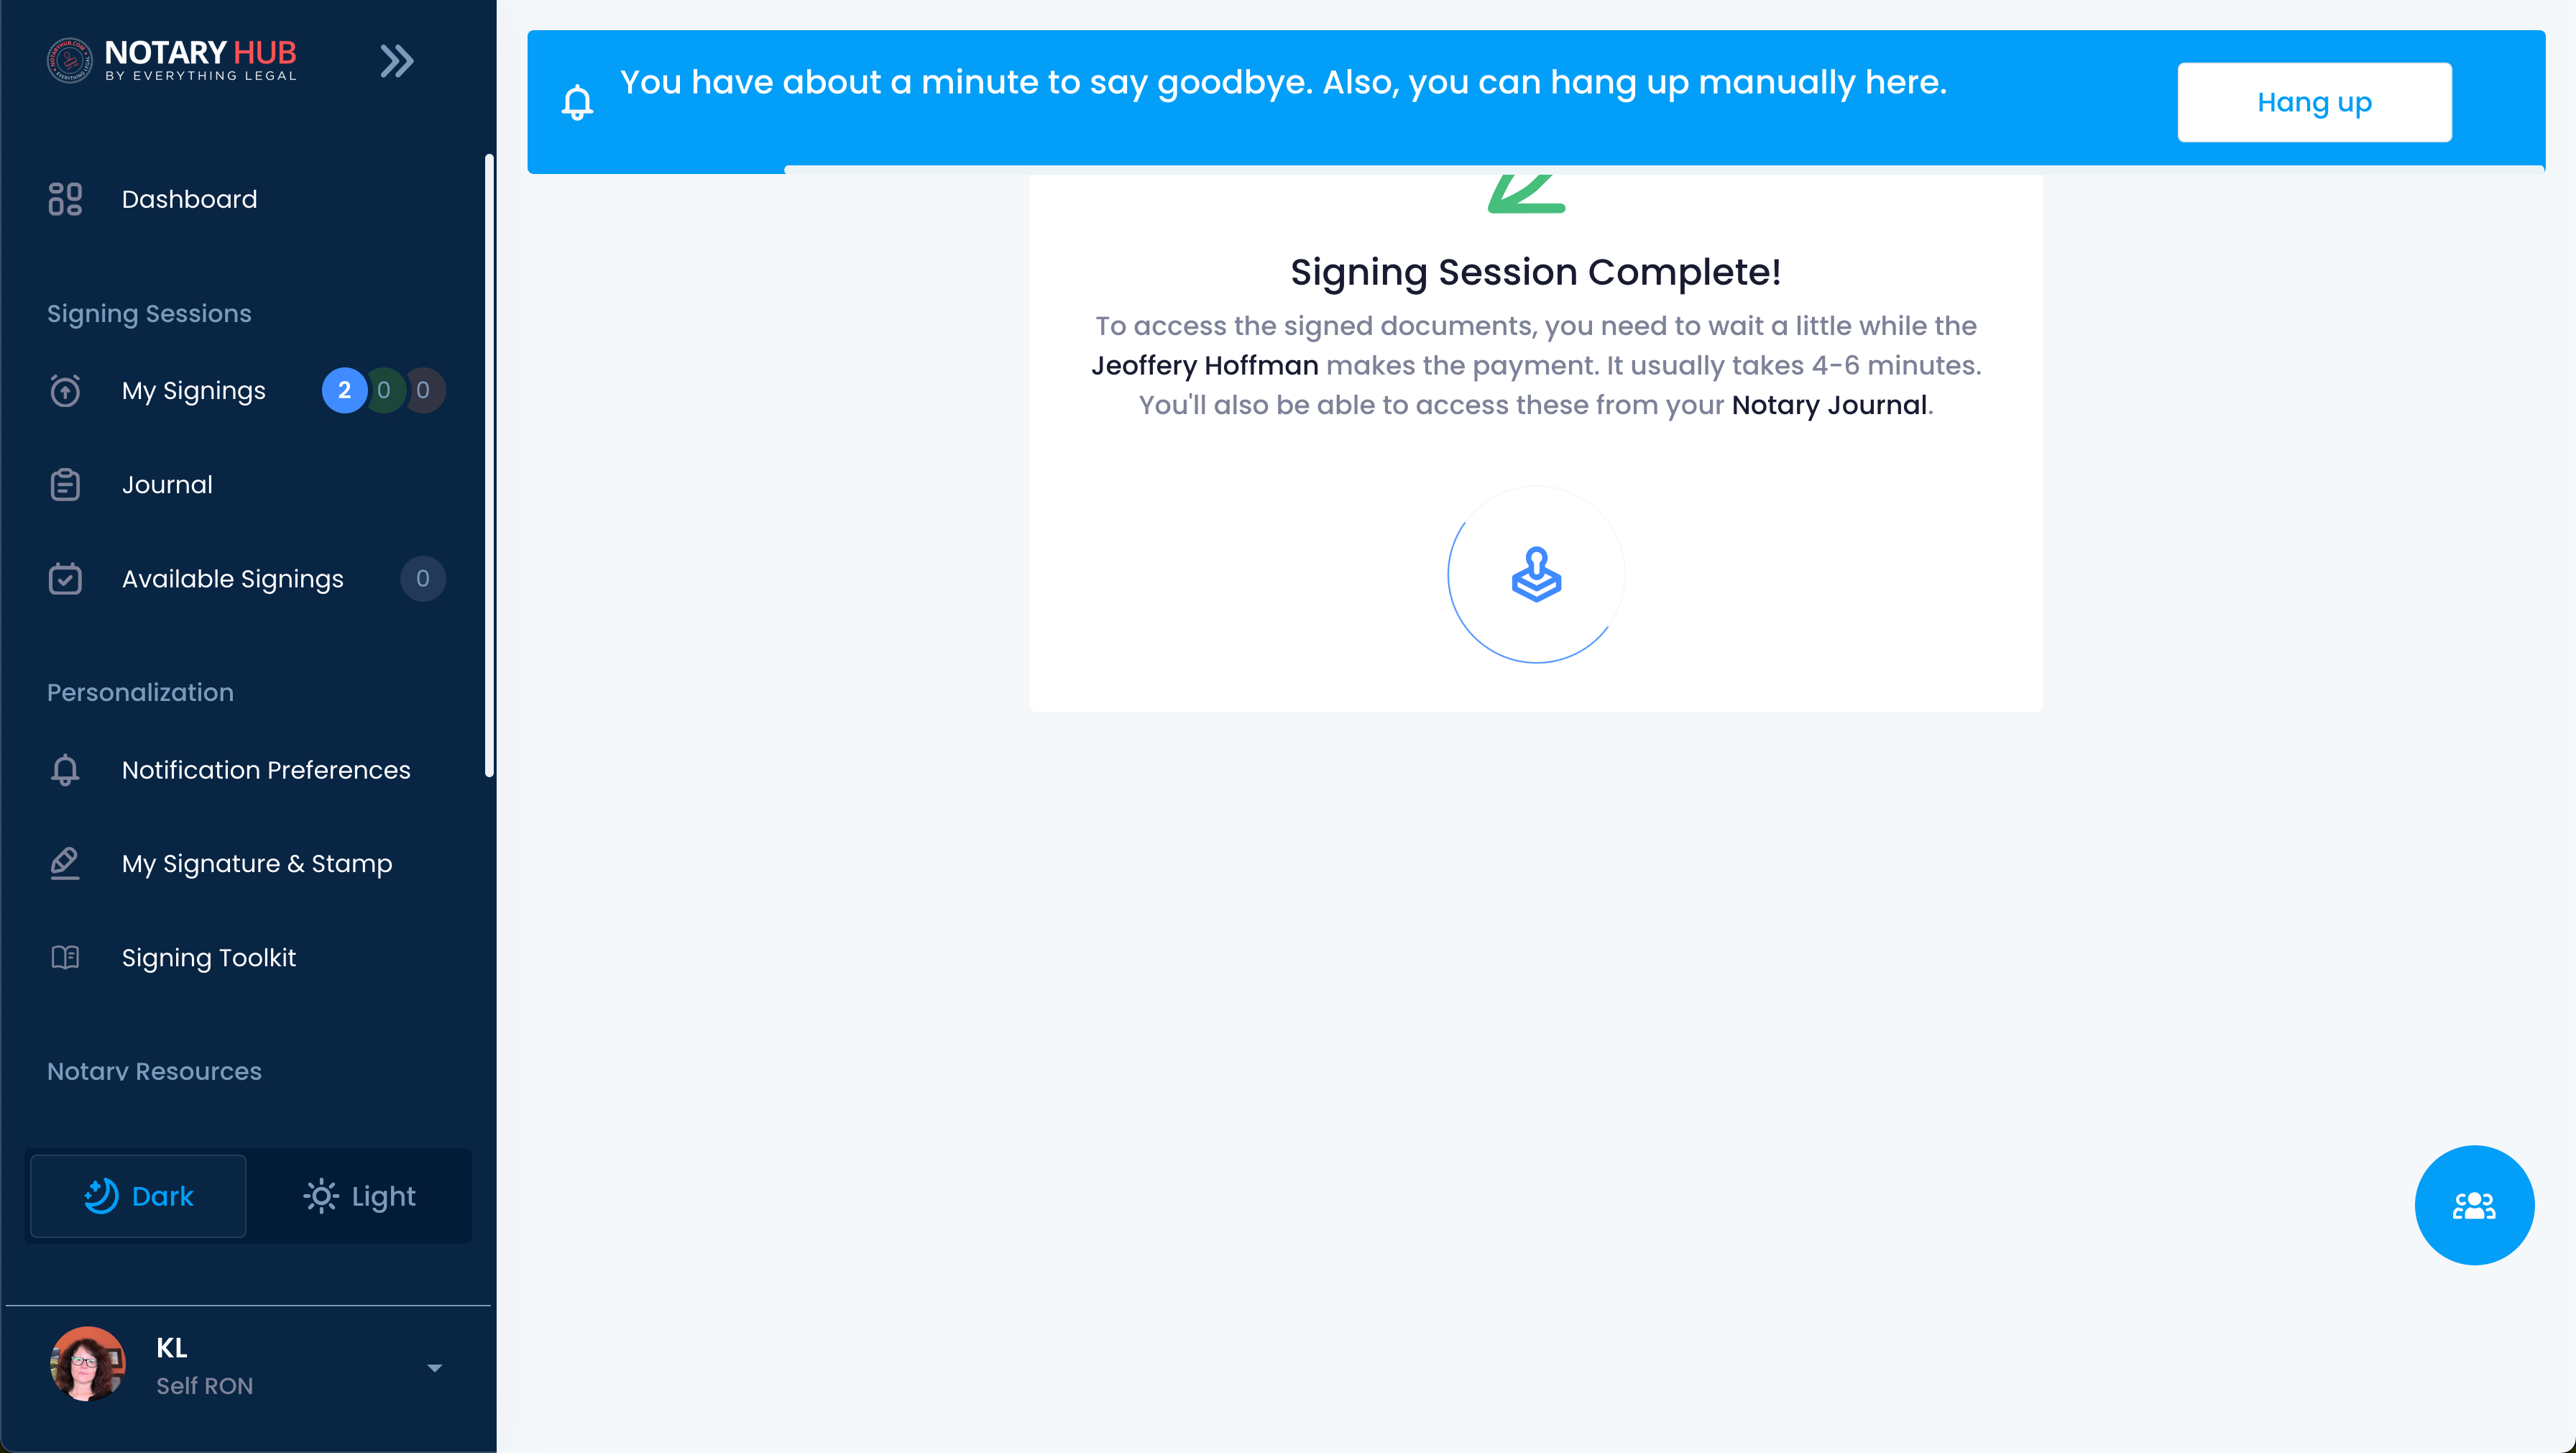 |
| Notaries can access finalized documents from their Journal page. Consumers will receive an email with a secure link to access their signed documents. | 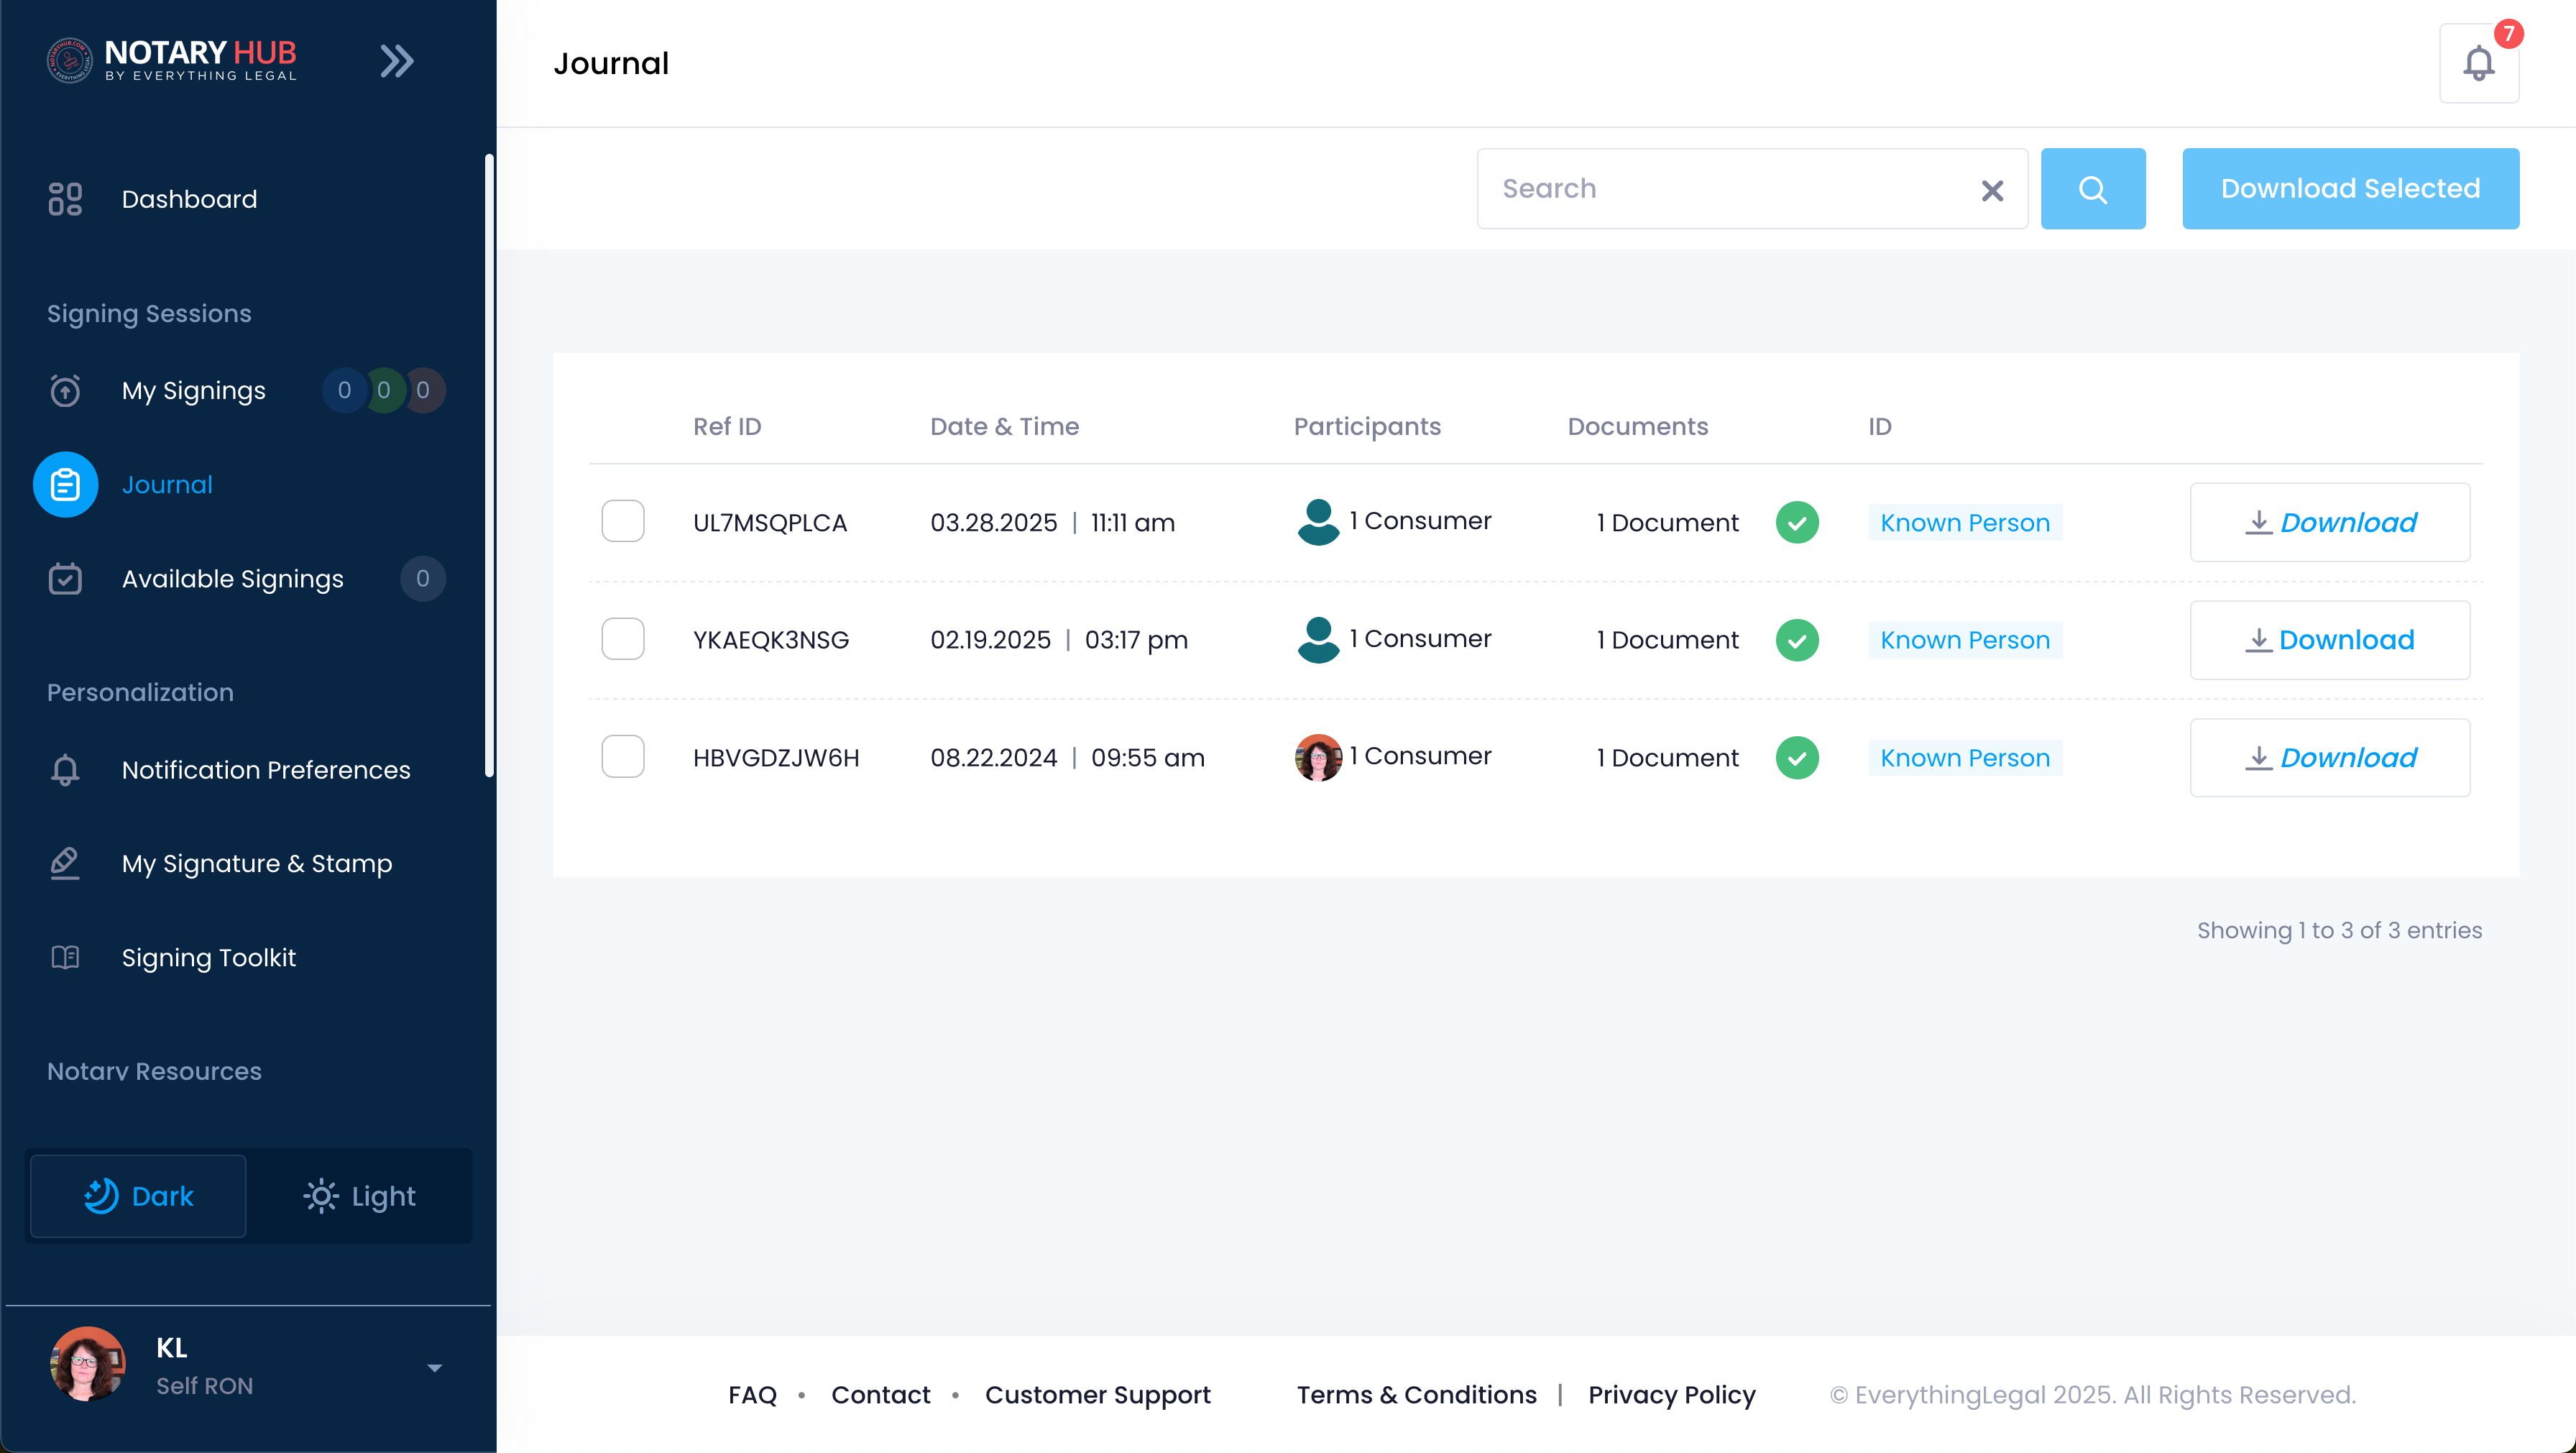 |
Alternative Scenarios
Using Identrust Instead of SSL
If you are using an Identrust certificate instead of an SSL certificate, follow these steps:
| Instructions | Visuals |
|---|---|
| Conduct the notary session to the final step of locking the document. |  |
| You will see the merged document for review. After reviewing the document, click the blue "Sign this document" button. |  |
| You will be prompted to choose a digital certificate from your system. |  |
| Select the appropriate X.509 certificate from the list (e.g., your Identrust certificate). |  |
| Enter your certificate password or PIN and click the blue "Confirm" button. |  |
| After a successful signature, the document will be signed with your digital certificate. |  |
Troubleshooting & Frequently Asked Questions (FAQ)
Q: Can I finalize multiple documents in the same session?
- A: Yes, if your session includes multiple documents, they can all be finalized together once all required signatures are completed.
Q: How will I know the document has been successfully finalized?
- A: You will see a confirmation message.
Q: Can I add additional pages to a document after it has been finalized?
- A: No, once the document is locked, no pages can be added or modified.
Q: How do I send the finalized document to signers?
- A: Notary Hub automatically emails a secure copy to all parties. You can also download and send it manually if needed.
Q: Can a signer download the document after the session?
- A: Yes, signers receive an email with access to the finalized document.
Q: Can I print a hard copy of the finalized document?
- A: Yes, the PDF can be printed, but its digital certificate and tamper-proof seal are only verifiable electronically.
Q: What security measures are in place to prevent tampering after finalization?
- A: The document is digitally sealed with encryption and includes a cryptographic certificate verifying its authenticity.
Q: How does Notary Hub ensure compliance with state regulations?
- A: The system follows RON standards, generates an audit trail, and applies state-specific compliance settings.
Q: Can I store finalized documents in Notary Hub for record keeping?
- A: Yes, but storage duration depends on platform policies and state requirements. Always maintain backups per local regulations.
Q: What should I do if the "Lock this Document" button is not working?
- A: Ensure all required signatures and fields are completed. If the issue persists, refresh the page or contact support.
Q: What if a signer claims their signature is incorrect after finalization?
- A: The document cannot be edited, but a new session may be required to correct errors. Refer to your state’s correction procedures.
Q: Can I recover a document if I accidentally delete it after finalization?
- A: Deleted documents may not be recoverable. Check your account settings for archive options or contact support.
Q: Does finalizing a document automatically notarize it?
- A: No, notarization must be completed before locking the document. Finalization ensures the document remains unchanged afterward.
Q: Can I notarize a document without finalizing it immediately?
- A: Yes, but finalization is required before distributing the document as a certified copy.
Q: Will the finalized document include my notary seal and signature?
- A: Yes, all applied seals and signatures will be preserved in the final document.
Q: What if I notice a mistake after finalizing the document?
- A: A new notarization session may be required to correct errors. Always review documents carefully before locking them.
Q: Why is the "Lock This Document" button grey?
- A: The "Lock This Document" button will remain grey until all the necessary conditions are met, including your notary signature and stamp, at least one consumer signature on each document, and the RON statement. Hover over the button's tooltip for specific reasons why it's inactive.
Q: What happens if I finalize the session before all participants have signed?
- A: It is crucial to ensure all necessary signatures are obtained before finalizing. Once finalized, the session is typically closed, and further signatures cannot be added in the same session. You may need to initiate a new session.
Q: I locked a document by mistake. Can I unlock it?
- A: Once a document is locked, it generally cannot be unlocked within the same session by the notary. To unlock a document, the notary should open it again and perform a long press or right-click on the "Document Locked" button, but a constituent must be present in the session. If no constituents are present, the context menu may appear disabled.
Q: What if the "Finalize Session" button doesn't turn green even after I lock all documents?
- A: Ensure that at least one document is present in the session. If all documents are locked and at least one remains, contact Notary Hub support for assistance.
Q: I am having trouble with my SSL certificate during finalization. What should I do?
- A: Ensure you have correctly set up your X.509 certificate and that your authenticator app is generating the correct code. See X.509 Certificate Setup Guide for more information.
Q: What happens to the signed documents after I finalize the session?
- A: A merged PDF document is produced. Guest users will receive a secure link via email to access their documents. Registered users can typically access their finalized documents from their "My Signings" page or Journal.
Q: Can I add more fields to a document after it's locked?
- A: Yes but you will need to unlock the document first before the session is finalized. If the session is finalized you cannot add fields or edit the document and will need to start a new signing session.
Q: What if a guest user cannot access their documents after I finalize?
- A: Ensure the guest user checks their spam or junk folder for the "Access your documents" email from Notary Hub. If the link has expired (typically after 72 hours), you can resend a new link from your Journal page. The "Send Document URL" option will be available in your Journal.